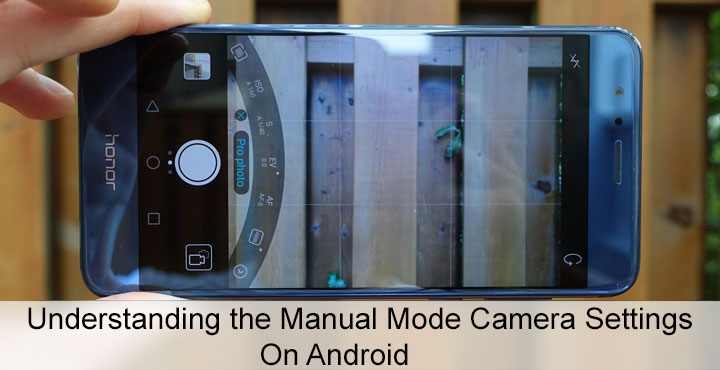
Most of us are just used to taking pictures by pointing our smartphone at something and tapping. All the required parameters, in this case, are set by the smartphone software and we just accept whatever the result is. Or sometimes we don’t and we’d go use Instagram filters or a nice photo editor app to make the picture look better. The most advanced settings many of us have ever played with are to turn on or off HDR, flashlight, or to adjust the exposure in some cases. But for the most part, it is an automatic process. Now with more and more Android flagships offering a manual mode (pro mode in some cases), you are exposed to a number of different camera settings that just don’t make sense to you, if you’re not already a professional photographer.
The manual mode gives you a greater artistic control in the pictures you take provided you know how to use it. Most people are better off using the automatic mode. But in this age of Instagram and Snapchat, I think all of us would love to be part time photographers as well. Who doesn’t want to take the best possible picture after all?
Manual Camera Controls

Finding the manual mode is different in different camera apps, thus also different on smartphones by different OEMs. On Xperia devices, which by the way don’t yet offer as extensive a manual mode as the competition, the manual mode is simply a swipe away. On most other devices, the manual or the pro mode is usually nestled in with other creative modes like slo-mo, Time-lapse, etc. You would find the setting mostly on flagship smartphones since they’re the ones with the better cameras. Once you activate the manual mode, you’ll have a bunch of different settings on the screen. How easy are they to understand depends upon how the OEM has implemented them. However, it’s never easy enough and hence this post.
Don’t miss: All You Need to Know About Smartphone Battery: The Facts, The Myths
Metering mode
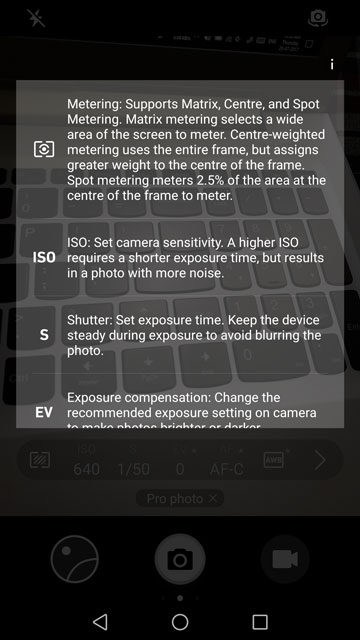
The most important aspect of taking a picture, is the presence of light. And one of the most important aspects of taking a good picture is the amount of light the camera sensor gathers. Taking photos inside a dimly lit bar is much different than taking a shot in bright sunlight. To measure the level of light and thus adjust the ISO sensitivity and shutter speed accordingly, the camera sensor measures light in three different ways – matrix, center and spot.
Matrix metering takes light from multiple points across the frame visible on your screen. Center metering does that too but it focuses more towards the center of the frame. Spot metering takes reading from a very small spot in the very center. Some camera apps will allow you to touch a spot on the screen from where you want the camera to gauge the light levels. This is sort of like touch to focus.
Controlling metering is really important when taking picture of a scene that’s unevenly lit. Light sources like a screen, lamp or the sun can alter metering and so can dark areas resulting in incorrect exposure.
ISO

ISO is a standardized scale used in the camera industry to measure a sensor’s sensitivity to light. It’s a product of the International Standards Organization, hence the acronym. A higher ISO number means more sensitivity to light. In the screenshots above, you can see two images of my laptop screen. One with a lower ISO value, which is better suited when taking pictures of a light source, such as a screen. The other one has a high ISO value, thus you can more clearly see the not so lit areas. You’ll have to find your balance based on the picture you’re taking.
Must try: LeafPic Gallery is an Amazing Alternative for Your Default Gallery
Shutter Speed
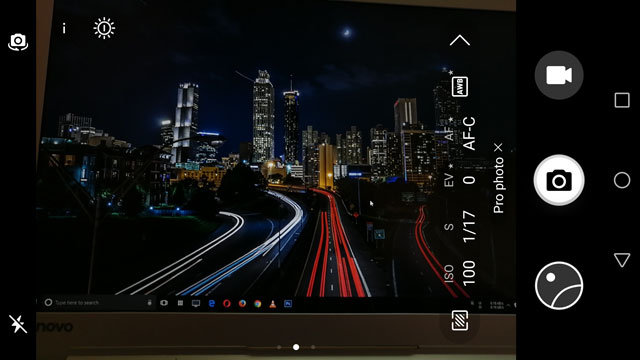
Your smartphone camera does not actually have a shutter, but traditional cameras have one. This shutter opens for a fraction of second letting the light hit the sensor and then shuts again to prevent the picture from being overexposed. Smartphone cameras simply start and stop recording data from the sensor to achieve the same result. The light is hitting the sensor at all times on a smartphone, unless you cover it. The data is just not being recorded at all times. It is measured in fractions of a second, and most cameras will feature an exposure range of 1/8000th of a second to 30 seconds.
Shutter speed is innately connected to ISO manipulation. In low light, you’d want the shutter speed to be slower, thus allowing in more light while in bright light, you’ll want it to be fast. The problem with very slow shutter speeds is that you will need a really steady hand and a steady object since the sensor will be gathering data for quite a while. If you move the camera or the object while it is doing that, you’ll end up with a blurry picture.
This is where the ISO setting comes in handy. Most of the times, you’re probably not going to hold still for 30 seconds so that your camera can take a picture. Increasing the ISO increases the sensor’s sensitivity to light, thus reducing the required shutter time. For fast moving objects, like Lionel Messi on the field, you’ll want a fast shutter speed.
Exposure or EV compensation
If you’ve ever tried fiddling with any camera settings before, you’re probably familiar with Exposure. It’s a basic setting that has been present on not only smartphone cameras for a long time but also camera phones predating the smartphone era. This allows you to over-ride the calculated ISO settings and shutter speed settings for a photo. If a combination of shutter speed and ISO produce an unsatisfying image, manual exposure is often offered as a way of tweaking the brightness of an image in-camera. This can also be easily adjusted by increasing the brightness of the picture after it has been taken.
You may also like: 5 Best Photo Editing Apps for Android
Focus
Manual focus controls aren’t as rare as they used to be just a few years ago. With manual focus, you have control over the focal point of the camera. This is especially helpful when you’re trying to take picture of a very close object, but the camera tries focusing on the objects farther away instead.
White Balance


You’re also probably familiar with this setting. White Balance is what helps the camera detect the kind of white light that is largely visible in different environments. This is typically utilized to account for different light sources (fluorescent, incandescent, etc.), as well as different weather types and times of day (overcast, sunny, sunset, etc.). A white object might appear white in sunlight, but will have some hue when viewed in candle light. Candle light or tungsten light are on the warmer end of the light spectrum. Thus objects viewed in their light have a reddish tint. To compensate for this color tint, the camera shifts the color temperature towards blue. But if you’d prefer, you can change that to create a more artsy looking photo.


Does no one proof read anymore? This article, as informative as it may be, is poorly written. There is nothing as annoying as misspelled words except words which are entirely missing, which this article suffers from, as well as it’s associated articles; One of which has to do with taking good pictures in low light conditions (this article is a link on that page). You may think that I am nitpicking but America was not built on mediocrity but on concerted striving for excellence!