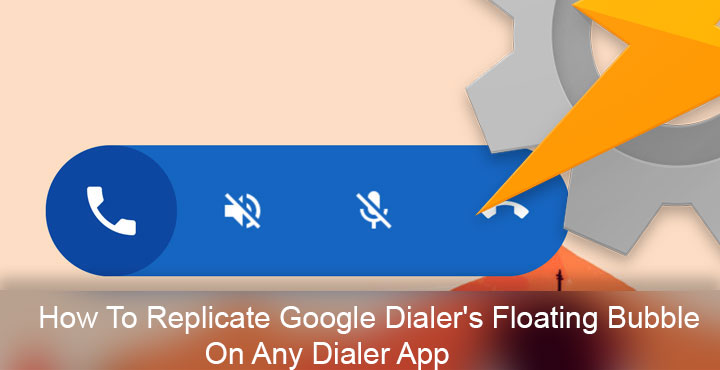
Google Dialer, if you somehow didn’t know, is the default dialer app on Nexus and Pixel devices. It is a modification of the stock AOSP dialer, with some extra features added by Google. The difference between the two has become more obvious since the introduction of Google Pixel devices. The latest Google Dialer was found to have another new, and a really helpful new feature that the company is working on. It’s not activated officially, but the code is there. Naturally, developers had to enable it, they’re a curious lot luckily for us. When activated, a floating bubble overlay appears on the screen during a call, tapping which reveals a couple of dialer functions such as speakerphone, end call, etc. Now, you can replicate Google Dialer’s floating bubble onto any Dialer with Tasker and AutoTools.
Why would you want a floating dialer bubble you ask? Well, imagine being on a call, earphones plugged in, while you browse the web on your phone. Sure there is the status bar notification but you have to swipe to bring it down first. A floating bubble would rather come in handy, especially considering it offers more controls than a notification. There have been a couple of methods to get this feature working but you would need to install Google Dialer in any case.
Let’s first thank João Dias, the developer of AutoTools which is a popular Tasker plugin and Mat Zolnierczyk for improving upon João‘s work. Because it is their work that has now made it possible for Google Dialer’s floating bubble to be added to any dialer app you use, without root. Yes, even the stock dialer app by your OEM will do. You’ll obviously need Tasker and AutoTools installed on your device.
Install Tasker
[googleplay url=”https://play.google.com/store/apps/details?id=net.dinglisch.android.taskerm”/]Install AutoTools
[googleplay url=”https://play.google.com/store/apps/details?id=com.joaomgcd.autotools”/]Download Tasker Project file
Don’t miss: 6 Best Contacts and Dialer Replacement Apps for Android
Preparation
- Launch Tasker and grant it all the necessary permissions. It requires a lot of them due to all the functionality it provides.
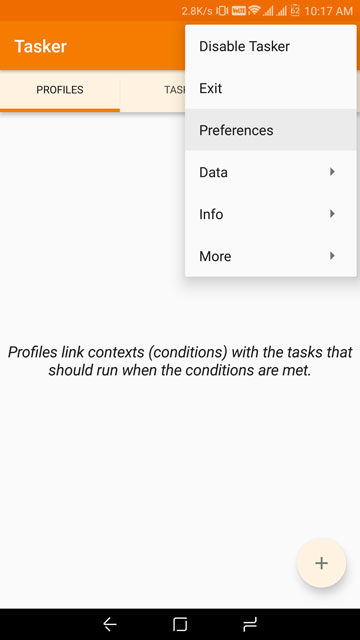
- Tap on the three-dot menu icon in the top right and select Preferences.
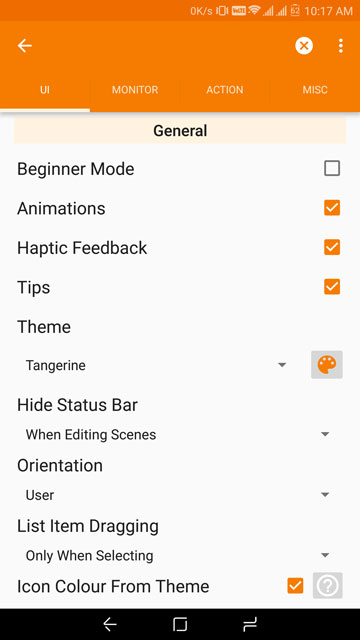
- Uncheck Beginner mode and then press the back button. You’ll notice the UI has changed a bit. Nevertheless, exit the app.
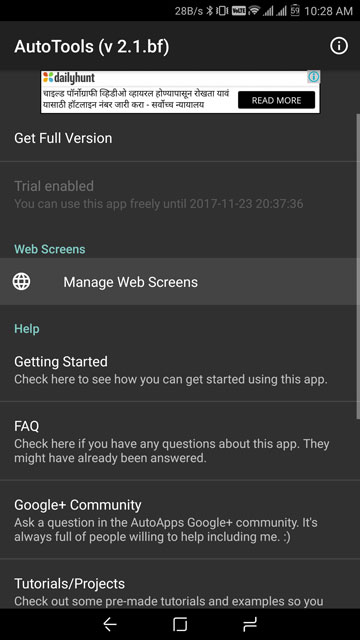
- Open AutoTools (grant permissions) and go to Manage Web Screens then tap the + icon at the top.
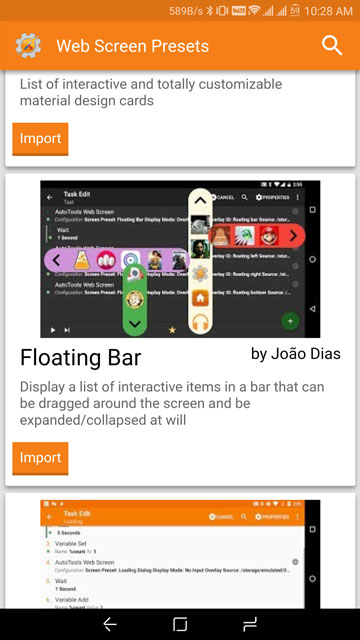
- Scroll down the list or use the search function to find Floating Bar and tap on the IMPORT button.
- Download the zip file linked above and extract the contents.
- Move the file named Dialer.prj.xml into the Tasker/projects/ folder on your device’s internal storage. Move the callui folder to Tasker/icons/ folder. It is possible that there is no icons folder in your Tasker folder. In that case, you can manually create it.
How to replicate Google Dialer’s floating bubble
- Launch Tasker and tap the home icon at the bottom left corner.
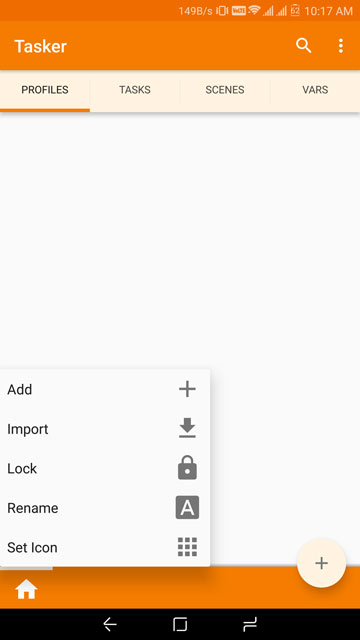
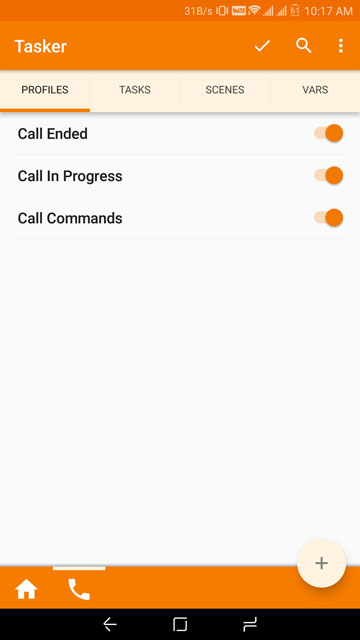
- Select Import and then select the Dialer.prj.xml file you moved to the Tasker projects folder. It will be named only as Dialer in Tasker. You’ll now notice a new dialer icon next to the home icon and several enabled profiles. If you switch tabs, you’ll also find just as many Tasks under the TASKS tab and several Variables under the VARS tab. If you need a run through of all the configurations and details of the project, be sure to check out the source links below.
That is pretty much all you have to do on your end thanks to all the work from João Dias and Mat Zolnierczyk. Make sure Tasker is enabled though. If not, you can enable it by tapping the three-dot menu icon and selecting Enable Tasker. When Tasker is enabled, you’ll see a persistent notification in your notification tray and a flash icon in your status bar.
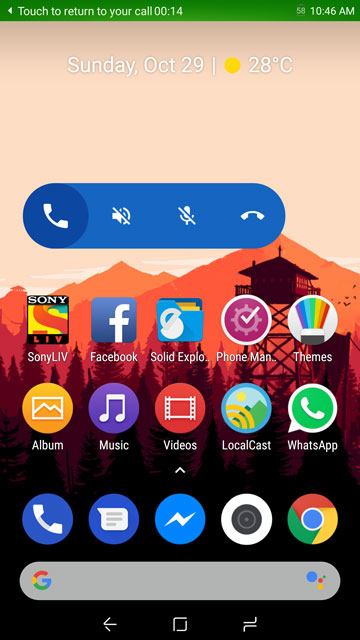
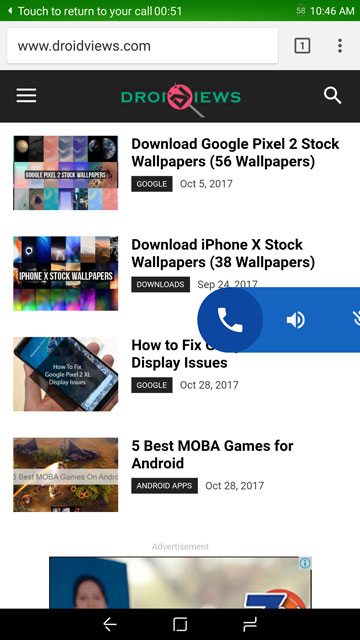
The next time you call someone or someone calls you, you’ll notice a big blue dialer icon on your screen that you can move around. Tap on it and it opens up to show some call controls. Even though you can move the Dialer bubble anywhere, you might want to keep it to the left of your screen because it tends to expand towards the right, regardless of its position on the screen.
Must read: 5 Best Xposed Modules for Android Nougat
Sources: João Dias, Mat Zolnierczyk


Join The Discussion: