Google has announced Android M in the Google I/O conference and displayed some awesome features added in the Android M. However, Google seems to have skipped (deliberately?) the native Multi-Window feature in the keynote, but Quinny899 of XDA has already found a way to enable it on the Nexus 5, 6 and 9 devices running Android M developer preview.
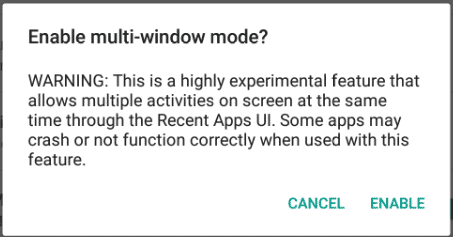
It’s worth mentioning that upon enabling this feature on Android M, you’ll face a pop-up warning which says that it is a highly experimental feature which uses RecentsUI to enable multiple activities on the screen simultaneously, and some of the apps might crash. This might explain why Google hasn’t mentioned this feature in the keynote. Nevertheless, we’ll see how to enable this feature on your Nexus device running Android M developer preview.
If you haven’t already updated to Android M, follow the below link:
This little hack involves editing the build.prop file in the system partition, so you’ll either need root permissions or a custom recovery. Since no proper root access is available for Android M, you have to install the TWRP recovery on your Nexus device. Follow the below links to flash TWRP on your device:
Now that we’re ready to proceed, let’s see how to enable Multi-Window mode on Android M Developer Preview.
Warning
Warranty may be void if you follow the below procedure. You alone are responsible for any consequences that might occur during the process, we shall not be held responsible for any damage to your device.
Prerequisites
- Charge your Nexus device above 60% battery level to avoid shutdowns during the process.
- Backup your device storage, Contacts, SMS, etc. using Google Sync service or any third-party app as the entire device will be wiped clean.
- Enable USB Debugging option on your phone: Settings> Developer options> USB Debugging. If you do not find the developer options, you’ll have to make it visible manually.
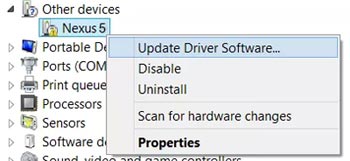
- Download and install the latest Google USB Driver on your Windows PC. Since the USB drivers is not an executable file but a zip, it requires special steps to install it. Download and extract the zip to your desktop. Connect your device to the computer. Press Windows+X keys on the keyboard and click on Device Manager option. Now click on the “Other Devices” expander button. Right click on Nexus 5 (with yellow triangle sign) and select “Update Driver Software”. Then click on “Browse My Computer for Driver Software”. Locate the “latest_usb_driver_windows” folder and select the Install option. When the driver is installed, your device should show in the device manager as“Android Composite ADB Interface”.
- Download and setup Android-SDK on your computer, or simply download the Minimal ADB and Fastboot tool: adb-and-fastboot.zip
How to Enable Multi-Window Mode on Android M Developer Preview
- Boot your Nexus device into recovery mode. For this:
- Power off your device and wait until proper shutdown.
- Press the Volume Down + Volume Up + Power button together to reboot to fastboot mode.
- Now highlight the Recovery option using volume buttons and then press the Power button to select and boot into recovery mode.
- Connect your device to the PC using a USB cable.
- In TWRP, tap on Mounts, and then tick the System partition to mount system for our little hack.
- Navigate to the folder where you’ve extracted the ADB and Fastboot files and open a command prompt by pressing Shift + Right-click on any empty space inside the folder and select Open command window here from the context menu.
- Copy paste the below command and press enter key to pull the build.prop file in the system partition.
adb pull /system/build.prop
- Open the build.prop using any text editor (preferably Notepad++) and find the ro.build.type string in the file.
- Change the text after = to “userdebug” from “user”
- Save the file and execute the below command to push the build.prop file to its original location on your device.
adb push build.prop /system/
- Now, we have to set proper permissions to the modified build.prop file, so execute the following command to open ADB shell:
adb shell - Execute the below commands one after the other to set proper permissions:
cd system
chmod 644 build.prop
- Reboot the device from the TWRP menu.
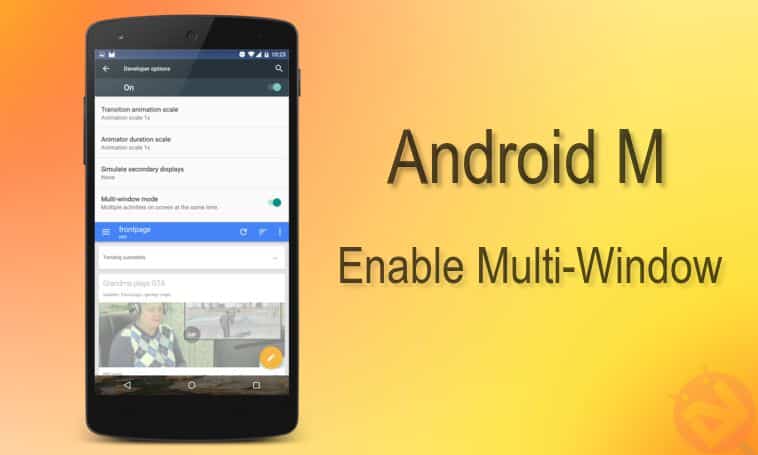
When your device boots up, go to Settings » Developer options, swipe down to Drawing category and find the Multi-window mode. Enable it by toggling the button and you’re done.
How to use Multi-Window on Android M:
After enabling the multi-window option, press the Recents key, and then tap on new icon you see to the left of close (x) button. You’ll see 3 options, setting the app to upper half of the screen, or lower part, or full screen.
Let us know how it’s to your liking in the comments section below.


Great guide! Thank you.
Thanks for the appreciation!