Among the most powerful photo editing apps, Snapseed comes bundled with tons of useful features. We have already discussed how you could add color pop, add watermark, etc using this app. Today, we are going to show how you could add a perfect dispersion effect to any image via Snapseed. Adobe Photoshop is a master in creating such dispersion and disintegration effects. In the mobile segment, well Snapseed is the closest you can get to. Let’s see how this could be done.
Create a Dispersion Effect via Snapseed
In this guide, we will be showing you from scratch how to add a disintegration effect. Just to make things clear, this will require some effort in getting a perfect dispersion effect. There already exist apps like PicsArt that have a preset dispersion effect. However, it more often than not applies the same set of effects to each image. Still, you may get a satisfactory result. However, knowing everything from scratch has its own benefits. And if you echo this thought, here are the steps to create a dispersion effect via the Snapseed app.
Steps to Follow
First off, download an image with the dispersion effect. There are tons of websites offering free stock images (like Unsplash, Pixabay, etc). Download the desired one and proceed with the below steps.
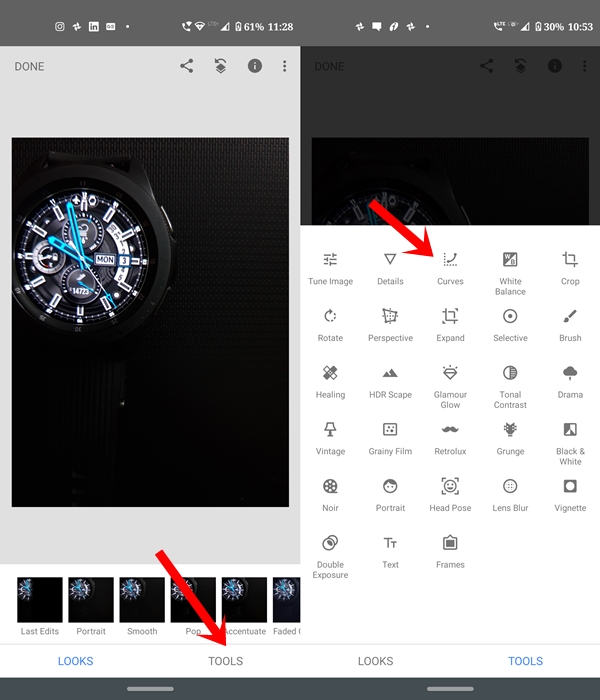
- Open the image in Snapseed on which the dispersion effect needs to be added.
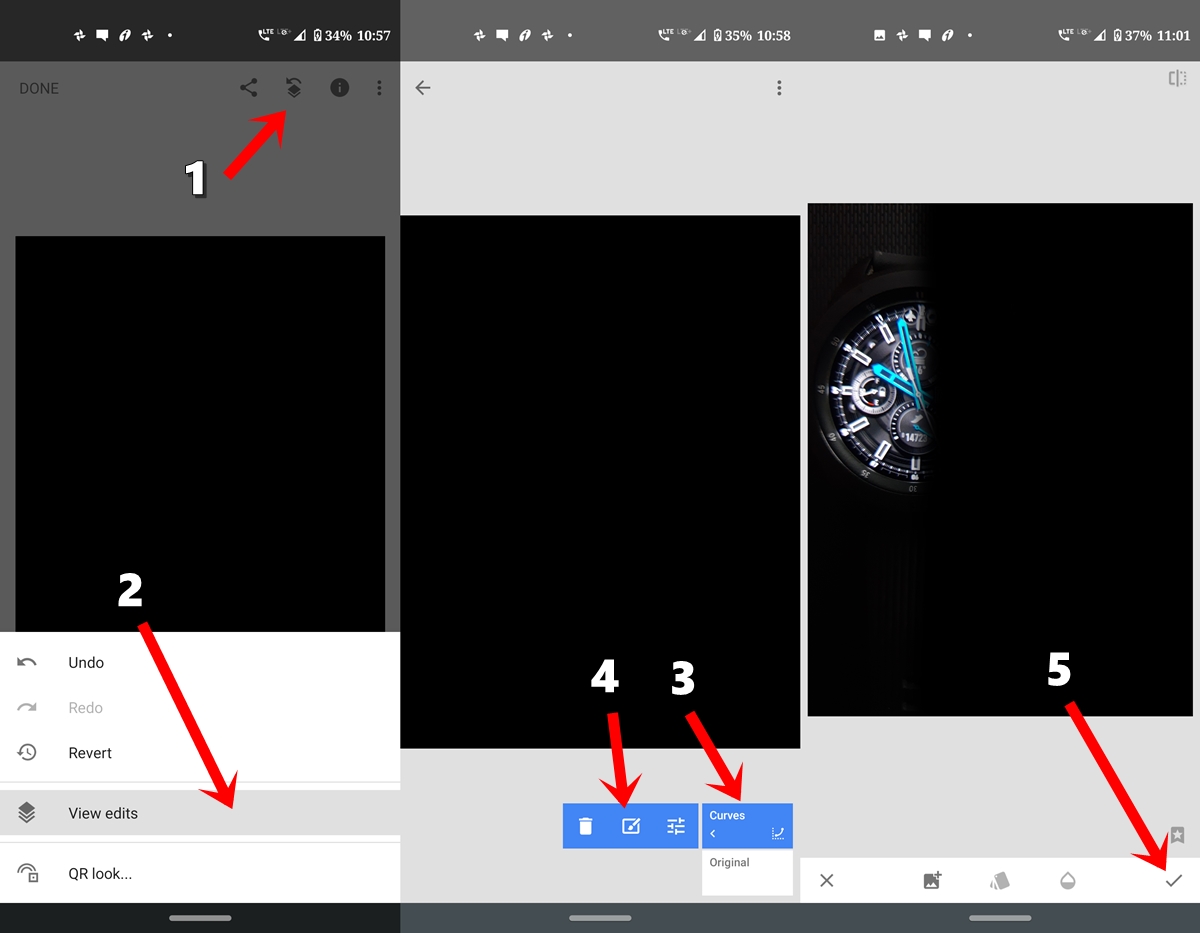
- Head over to Tools section and tap on Curves.
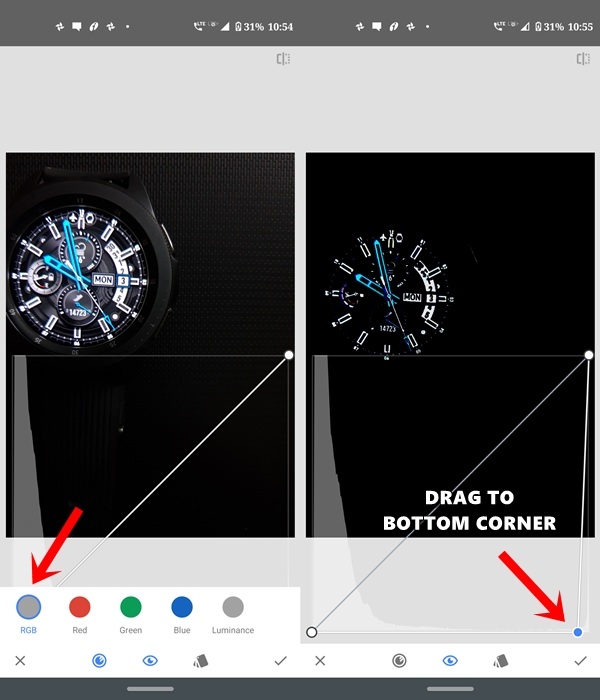
- Tap on Channel and select RGB. Drag from the center and slide the curve to the bottom right.
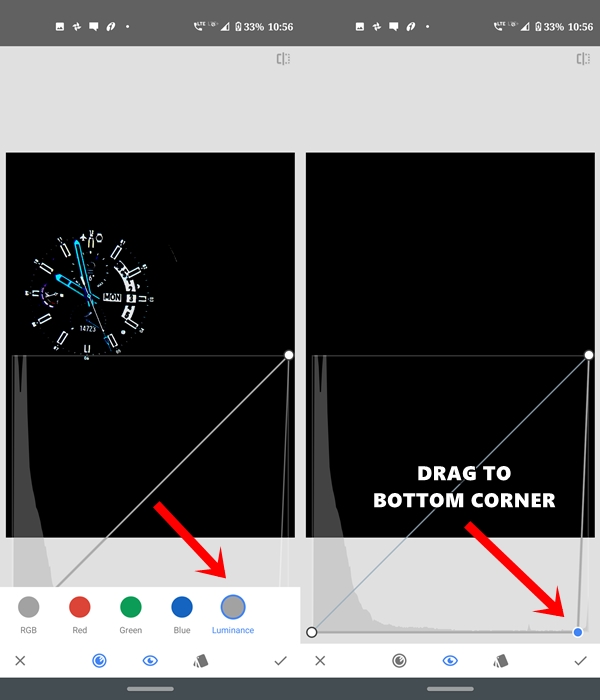
- Again, tap on Channel and this time select Luminance. Likewise, drag the curve to the bottom right. This should make the entire image black. Don’t worry, you’re on the right track. Tap on the tick mark to confirm this.
- Next, tap on Edit Stack and head over to the View Edits section.
- Tap on Curves and then on the brush icon. Now paint the part of the image over which the dispersion effect needs to be added in Snapseed. Tap on tick once done. This should make the highlighted portion black. This covers the first half of the guide on how to add dispersion effect via Snapseed. Let’s now discuss the second half of this guide.
Adding Image with Disintegration Effect
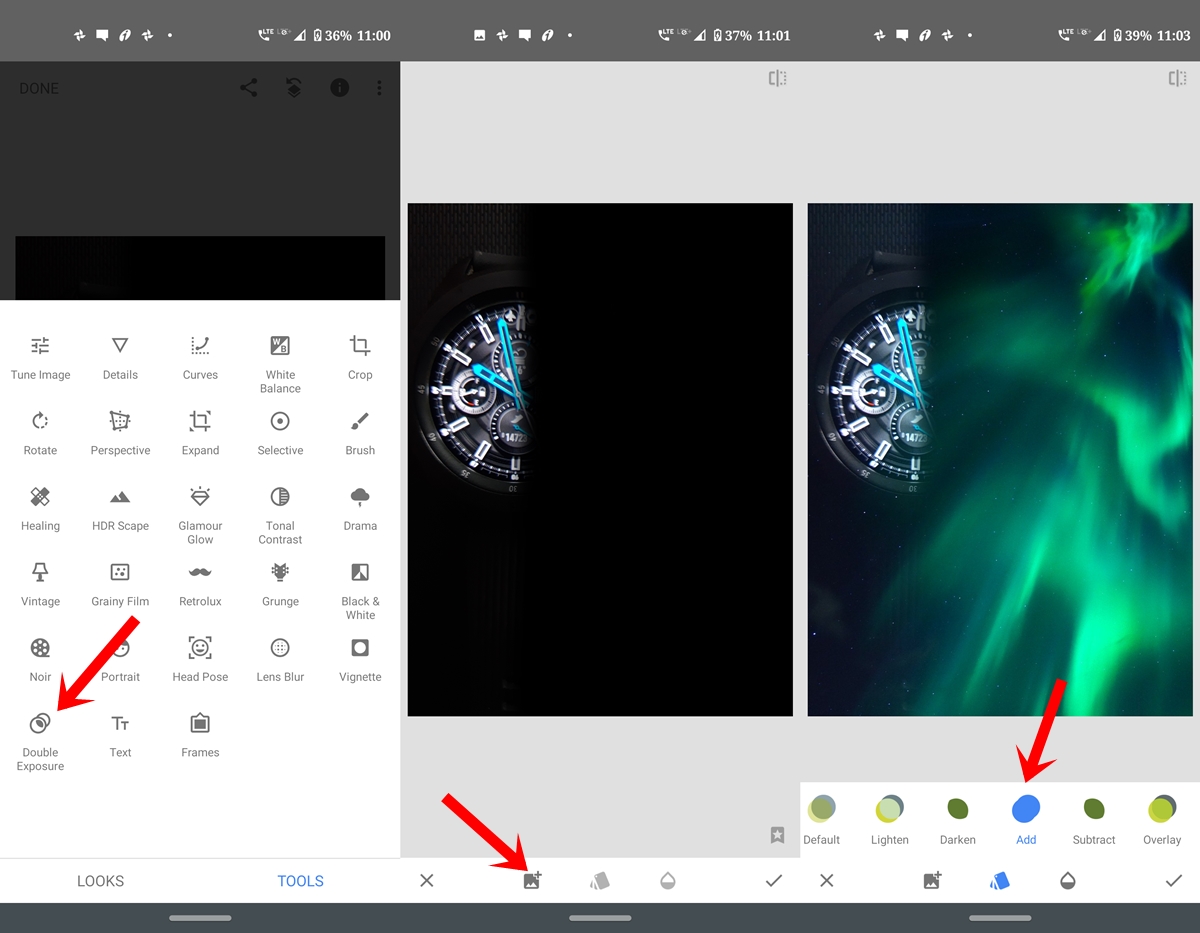
- Next, tap on Tools and head over to Double Exposure. Tap on the Add image icon and select the image with the disintegration effect.
- Now place that image over that highlighted black portion and tap on the Style icon. Select Add from the menu and tap on the tick mark.
- Again tap on the Edit Stack icon and then on View Edits.
- Tap on Double Exposure and then on the brush. Highlight the farthest end of the subject with the Double exposure set to the default value of 100.
- As you move towards the subject, decrease the exposure strength to 75 and then to 50 at the nearest to the subject. But make sure only to brush the black portion. Try to avoid the subject while highlighting. Once done, tap on the tick mark.
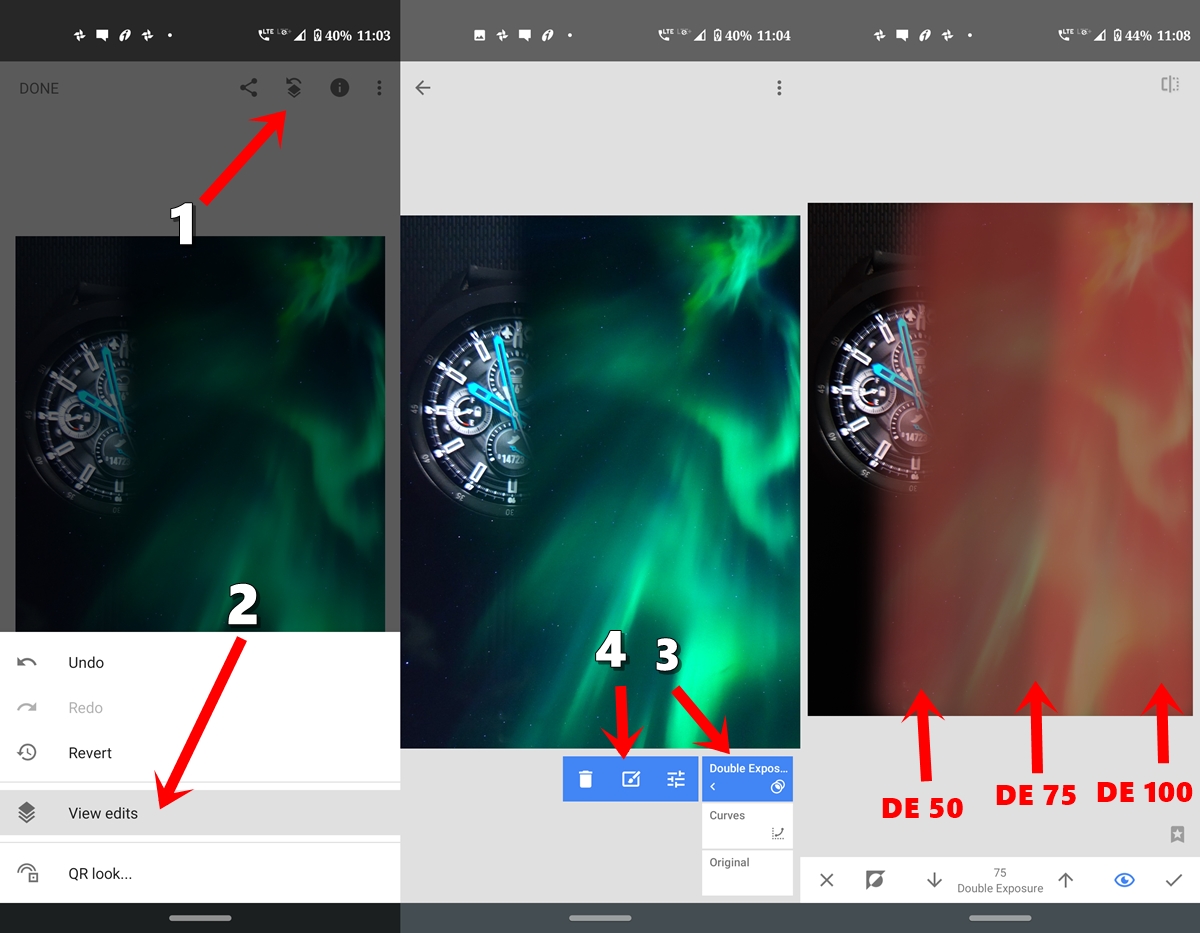
- Finally, tap on Done. This will save your image with the disintegration effect.
So with that, we conclude this guide on how to add dispersion effect to any image using Snapseed. What do you think of this trick of applying the splatter effect on your image using Snapseed? Do share your views on the same in the comments section below.


Join The Discussion: