“The best thing to do after buying an Android device is to root it.” If I said this a few years back, people would be so angry at me saying it will compromise warranty and the device can get into issues. Things have changed now, and many Android users liked the taste of freedom after rooting the device. Rooting an Android device has a plethora of advantages – removing bloatware, adding performance boosting scripts, awesome mods and much more. Also, there are plenty of methods to gain back warranty and restore stock firmware.
Huawei Mate 9 is a mammoth device with a screen size 5.9″ and would be the best fit for media lovers. An unofficial build of TWRP recovery is available for Huawei Mate 9, and it can be installed on your device using fastboot commands. Once you have a custom recovery, you can simply flash SuperSU or Magisk systemless interface to root your device. Today, we’ll see how to install TWRP recovery and root Huawei Mate 9.
Must read: How to Install Google Apps on Chinese Huawei Mate 9
Prerequisites
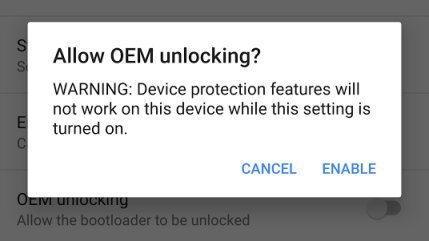
- Go to Settings » About phone » Build number and tap it 7 times to enable Developer options on your device. Then go back to Settings »Developer options and enable USB Debugging and OEM unlocking.
- Download the Minimal ADB and Fasboot Setup and install it on your computer.
- Install Huawei smartphone drivers on your PC.
- Unlock bootloader on Huawei Mate 9
- Backup important files on your device to a safe place as unlocking the bootloader will format your entire device.
- Make sure you have enough charge on your device before starting the process.
Downloads
How to install TWRP recovery and root Huawei Mate 9
- Download the TWRP image from the downloads section.
- Rename the downloaded TWRP image to recovery.img (for your convenience) and place it in the same folder where you have extracted the ADB & Fastboot files.
- Download the SuperSU ZIP and transfer it to your device’s storage.
- Navigate to the folder where you’ve extracted the ADB & Fastboot files and open a command prompt by pressing Shift + Right click on any empty space inside the folder and select Open command window here from the context menu.
- Connect your device to PC using a USB cable and boot into the bootloader mode using the below command:
adb reboot bootloader
- In the bootloader mode, type the below command to check if the device is detected.
fastboot devices
If your device is detected, you should see a serial number as output.
- Now, type the following command to flash the TWRP image to your device.
fastboot flash recovery recovery.img
- Once the flashing is finished, use the below command to reboot the device.
fastboot reboot
- Now, reboot the device into recovery mode. To do this, use the below command in command prompt.
adb reboot recovery
- To root your device, you can follow either of the below methods.
- In TWRP menu, select Install » SuperSU Zip file that we have transferred earlier.
- If you want systemless root, follow our step-by-step guide on Magisk systemless root.
- Reboot the device from TWRP main menu after rooting your device.
That’s it. You’ve successfully installed TWRP recovery and rooted your device.

C:Program Files (x86)Minimal ADB and Fastboot>fastboot flash recovery recovery.img
target reported max download size of 471859200 bytes
sending ‘recovery’ (19084 KB)…
OKAY [ 0.657s]
writing ‘recovery’…
FAILED (remote: Command not allowed)
finished. total time: 0.657s
How can i solve this troube?