Have you ever fancied experiencing your favorite operating system for mobile on your desktop or laptop computer? The very idea of any possibility of such a thing might thrill any tech-enthusiast. In the past, we shared another emulator tool for Windows-based computers that could recreate the Android environment. That tool called “WindowsAndroid” emulated Android 4.0 Ice Cream Sandwich on a pop window. Genymotion is a similar utility that lets you enjoy Android Jelly Bean on Windows PC, Mac, and Linux.
Here is another amazing emulator that does the same stuff but in a little more charming way. Genymotion, as this emulator is called, is a complete set of tools that provides a virtual environment for Android. The program is easy to use when set-up but before that, it is a little complicated.
The Genymotion Android emulator can be very useful for developers and app testers because it also supports ADB (Android Debug Bridge) and thus you can various tasks with it and even play games that are not compatible with your Android device.
If you are a developer, you’ll have to install the Eclipse plugin before you can test your application developed with Eclipse IDE. It uses ADB to connect to any active Genymotion Virtual Devices and then push your application via commands. While installing Genymotion, you are asked to choose an Android device that you want to emulate and the list of virtual devices with various screen resolutions is pretty big.
Compatibility
To be able to install this Android emulator to enjoy Android Jelly Bean on Windows, Mac, and Linux, you must have a system with any of the following Operating Systems:
- Windows XP SP3 (32 or 64 bits)
- Microsoft Windows Vista (32 or 64 bits)
- Microsoft Windows 7 (32 or 64 bits)
- Linux Ubuntu 12.04
- Linux Ubuntu 12.10
- Mac OS X 10.X
Downloads
To download the program, hit the link below and sing up with Genymotion.
How to Install Genymotion
As I mentioned above, setting up Genymotion is a bit complex and for that, you’ll need a guide on how to get things started.
- Download the Genymotion installer from the link above and run it on your Windows/Mac/Linux computer.
- When the installation is finished, double click the “GenyMotion” icon shortcut created on your desktop. Mac users can click on the icon from App directory and those with Linux can launch it by typing: [InstallationPath]/genymotion]
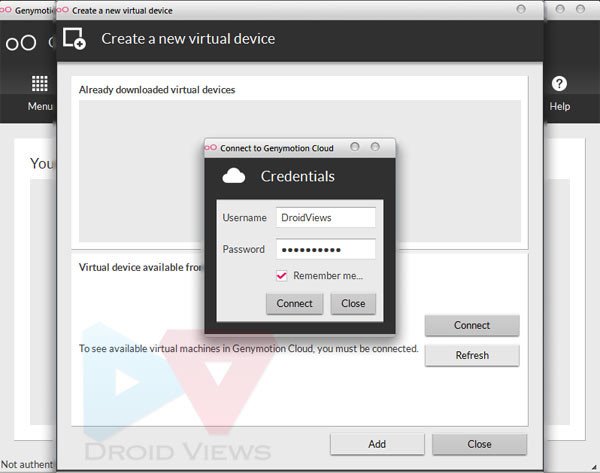
- When it is launched, click on Add button and then enter your Genymotion User name and Password when prompted.
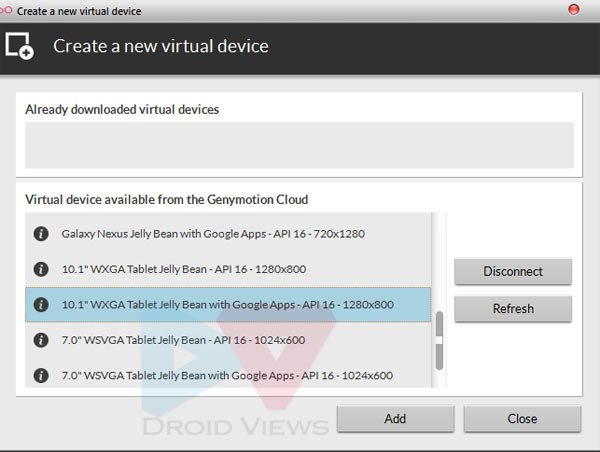
- Next, you’ll be asked to choose a virtual Android device which you want to emulate on your computer. Select a device from the list and then click on Add button.
- On the next screen, you’ll be shown the virtual device properties. Click on Next button.
- Your selected virtual Android device’s file will be downloaded now. In my case, it was 200 MB in size. When the download is finished, click on Next button.
- Then choose a name for your new virtual device, and then click on Finish.
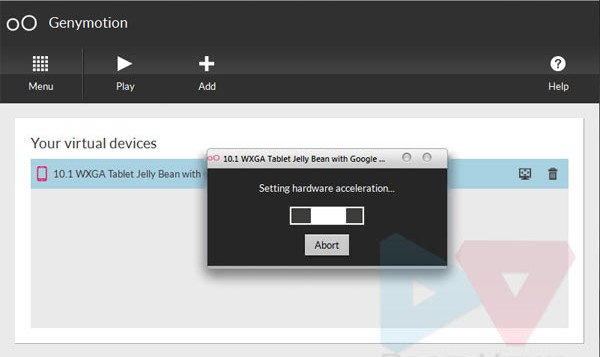
- Your virtual device will be created and you’ll see the following screen.

- Now close this window to come back to the main window.
- Finally, you’ll be greeted by the main window. Just click on the Play icon and wait till the real action begins.
- The emulator will ask you to define your Android SDK location before launching, If you have installed it, select the location. In case, you do not have it or do not want it for development purposes, just skip it.
- Your selected virtual Android device will now be ready at your service. If you are an Android user, I do not think you need any further guidance on how to explore the interface and settings.

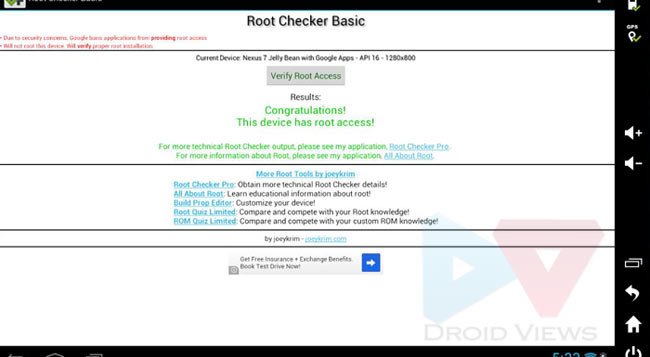
I forgot to mention it above that the Android 4.1 environment that you have on you computer is very much like your rooted phone. Just play with it, install your favorite apps and do all stuff that you do on your real phone except making calls.
Do not forget to share with us how Android feels on your computer! Cheers to all!
Read Next: Download Huawei HiSuite for Windows and Mac


on my computer the image appears broken all bad
Thanks ill give it a go later