Nexus devices have been great to use and provide the best Android experience. Though the latest version Android Lollipop runs fine on Nexus tablets but it fails to take advantage of big screens of tablets. Although few applications are optimized for tablet use, you get pretty much the same user experience that you would get on a phone. To take advantage of big screens of tablets and to get better productivity out of your Nexus tablets you can now install official Remix OS.
Not that long ago Jide Technology released the World’s first true Android PC, Remix Mini. Remix Mini is a palm size portable computer which can be hooked up with a screen, a mouse and a keyboard. It runs Remix OS, which is customized version of Android Lollipop. Remix OS is customized to meet your needs on a PC or a tablet. Now you could enjoy the same Remix OS on a Nexus 9 or 10 as they have released the official images for them and use your tablet more efficiently.
Remix OS developed by Jide Technology founded by three ex-Google Engineers is focussed to provide you better productivity with Android. It works seamlessly in both form factors whether using it on a tablet or on a PC. It has been optimized to work in both form factors. The following features help it to provide seamless user experience:
- Multi-tasking multi-windows
- Physical keyboard optimization
- Keyboard shortcuts
- Full app ecosystem
- Touchscreen optimization
- Resource efficient operation
What’s different in Remix OS?
The following features/functionality have been added in the Remix OS to make your tablet/PC experience more productive.
1. Taskbar
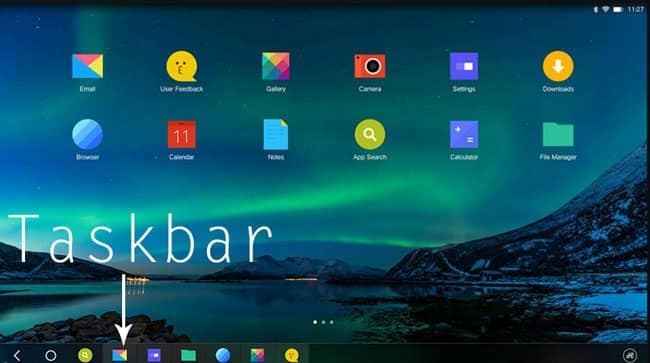
Taskbar is similar to what you may have seen on Windows platform. It is always accessible multitasking tray which also contains shortcuts to apps. You could drag any application to Taskbar to add it as a shortcut. It becomes easy to switch between applications with taskbar always visible on the screen. It also acts as the navigation bar for your device.
2. File Manager
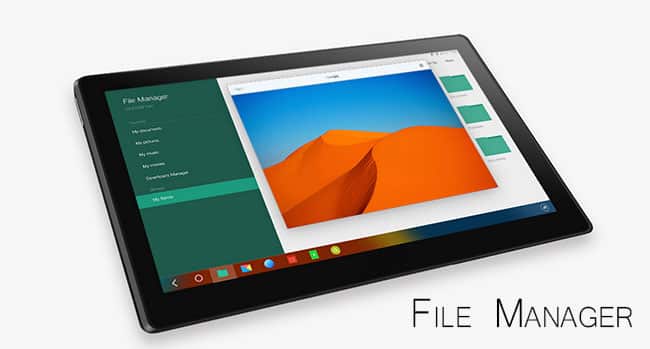
File Manager has been included in RemixOS by default. It has been optimized to work flawlessly on tablets or PCs, you could drag to select multiple files. Also, there is an option to preview files before opening them.
3. Multitasking with Multiple Windows
Remix OS allows applications to run in two modes, Phone mode, and Tablet mode. Opening an application in the tablet mode opens the application in fullscreen. Whereas opening the application in Phone mode runs the application in small windows, allowing you to run multiple apps at the same time. I feel this is a must needed features on a tablet. Tablets with 8-10 inch screen sizes are best for working with several applications at the same time.
4. Keyboard Shortcuts and Hotkeys
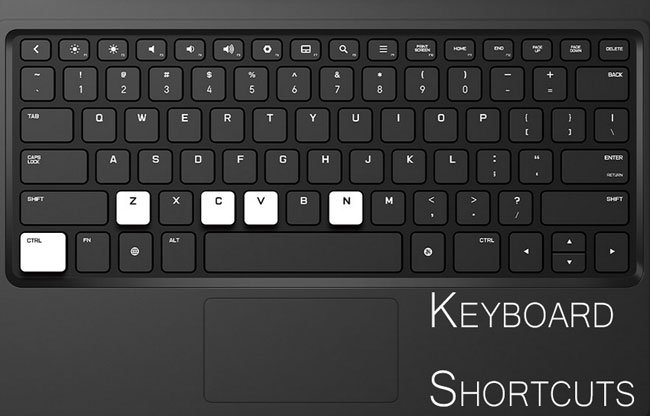
Remix OS provides the better compatibility with external keyboards. Several keyboard shortcuts like CTRL+C, CTRL+V, and CTRL+Z have been included to work just like they work on your PC.
5. Few Optimized Applications:
Remix OS includes few necessary applications which have been optimized for big screens of tablets. Applications like Email, Notes and Mobile Office are offered within the OS. They have been optimized for bigger screen sizes by including multiple panes that are visible all the time on the screen, no more sliding to access certain settings of the application.
Installation
Installing Remix OS requires the following things to do:
Unlocking the Bootloader
Disclaimer: Unlocking bootloader wipes everything off your phone. Backup everything before proceeding with the steps.
- Make sure your computer has working fastboot and adb. Install from here if you don’t have.
- Enable USB debugging on the device: Go to Settings> About Phone and then tap Build number several times till it says ‘You are a developer’. Now go to Developer Options and enable Android Debugging.
- Connect the device to the computer through USB cable.
- Now open Minimal ADB and Fastboot if you have it, or open command prompt from the folder where Fastboot is installed in your PC. To do so, navigate to fastboot folder and then right click while holding Shift key then select ‘Open Command Window here’.
- Now, type the following to boot the device into fastboot mode: –
adb reboot bootloader
- Once the device is in fastboot mode, verify your PC sees the device by typing –
fastboot devices
- If you don’t see your device serial number, and see “” instead, fastboot is not configured properly on your machine.
- From the same terminal, type the following command to unlock the bootloader:
fastboot oem unlock
- A disclaimer will display on the device that must be accepted. Use the volume keys to cycle through the options. Pressing the power button should confirm your selection.
- If the device doesn’t automatically reboot, reboot it from the menu. It should now be unlocked. You can confirm this is the case if you see an unlocked icon at the bottom of the Google boot screen during reboots.
- Since the device resets completely, you will need to re-enable USB debugging on the device to continue.
Installing Image Files Using Fastboot
- Make sure your computer has working fastboot and adb.
- Download image file for Nexus 9 or Nexus 10 from links given below.
- Unzip the downloaded zip file and go to the folder and copy the files to the fastboot folder.
- Connect your tablet to the computer via USB.
- Make sure the fastboot binary is in your PATH or that you place the recovery image in the same directory as fastboot.
- Open a terminal/command prompt on your PC and reboot the device into fastboot mode by typing adb reboot bootloader
- Once the device is in fastboot mode, verify your PC sees the device by typing
fastboot devices
- If you don’t see your device serial number, and see “” instead, fastboot is not configured properly on your machine or your device is not properly connected.
- Clean the existing data by entering the following command:
fastboot -w
- Flash images onto your device by entering the following three commands:-
fastboot flash system system.img
fastboot flash recovery recovery.img
fastboot flash boot boot.img
- Once the flash completes successfully, run the following command to reboot the device into recovery to verify the installation. fastboot reboot
Downloads
Try out Remix OS on your Nexus 9 or Nexus 10 to get the most out of your tablet. Do share your experience with us in the comments section below. Also ask your doubts, if any.


Join The Discussion: