
You might be doing a CC or BBC while sending various emails. More often than not, you would also attach your email ID in the CC or BCC field, as per the requirement. Now you could do the same using a handy Gmail extension. Even if you don’t send a carbon copy of the mail to yourself but there exists another user (your boss or HR) who has to receive the same, then this extension is equally useable in these scenarios. Let us now have a look at the steps on how to automatically CC or BCC any user in Gmail.
Automatically CC or BCC any user in Gmail
Before starting the guide on how to automatically CC or BCC any user in Gmail, it is quite important to get acquainted with the terms CC and BCC. CC stands for Carbon Copy whereas BCC is an acronym of Blind Carbon Copy. Suppose you CC a mail to 3 peoples, then all these 3 people will know that the other two have received the email. All three users could also see the email ID of everyone mentioned in the CC field. To learn how you can forward multiple emails in Gmail, take a look at our tutorial.
However, if you use the BCC field, then each of the three users would have no clue that the other two have also received this mail. Likewise, they wouldn’t be able to see each other’s Gmail address. Say you wish to communicate a message to three of your clients and let your boss know about the same as well. So in that case, you may enter the client’s email ID in the CC field and boss’ email address into the BCC.
Now that both the terms are clear, let us have a look at how to automatically CC or BCC any user in Gmail.
Don’t Miss: 7 Interesting Gmail for Android Tips and Tricks
Installing the Gmail Extension

Download the Auto BCC for Gmail from the Chrome Extension store. Since it deals with the compose mail section, it requires permission to read and edit your Gmail data. Only install the extension if you are willing to accept these requests. Apart from the above extension, you may also have a look at some other useful Gmail extensions and add-ons.
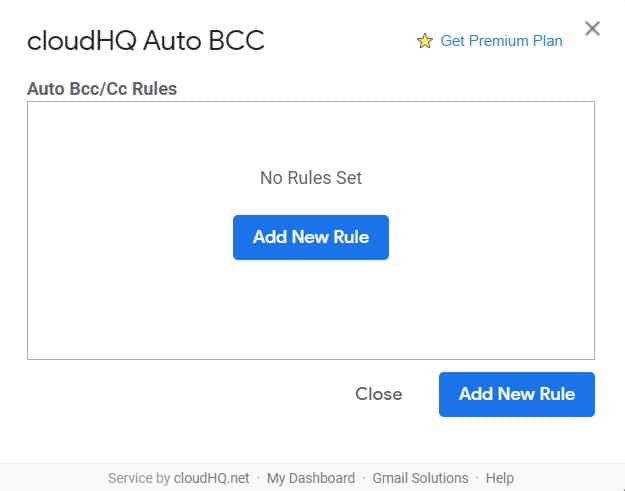
- Click on the auto-bcc icon next to the Send button.
- In the dialog box that opens, click on Add new rule.
- Now Automatic BCC Setup Box will open up. Configure it as given below. Follow exactly as mentioned below to avoid issues while automatically doing CC or BCC to any user in Gmail.
- In the “When emails are sent from” section, your current email address will be there. Leave it as it is.
- Just beneath that, click on “To only these recipients” and change it to “Everyone but not to” option.
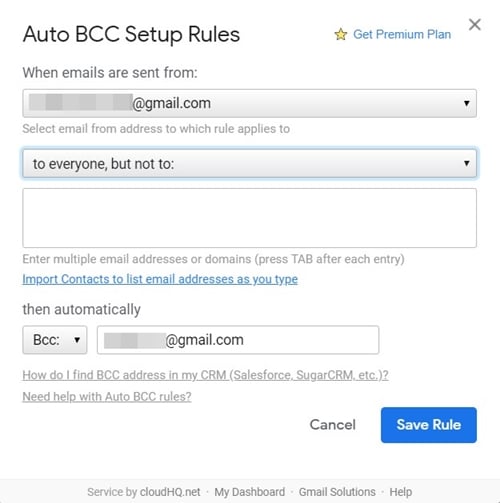
- Under the “Then automatically” section, select BCC or CC as per your need.
- Finally, enter the recipient’s email address. The recipient here will be the person who will automatically receive a BCC/CC of all the emails in Gmail that you are about to send from now on.
- Once done, just click on the Save Rule button.
That’s it. These were the rules to automatically CC or BCC any user in Gmail. When you no longer need to use this extension, make sure to revoke its access from your Google account. And if you face any error, while setting up this extension, do let us know in the comments section below.
Read Next: How to Recover Permanently Deleted Emails in Gmail


Join The Discussion: