We’ve all been there. And the problem is worse on Android than it is on iOS. I’m talking about the inconsistency of the system screen rotation controls. Even though you’ve set it to landscape, certain apps just wouldn’t follow. This gets especially annoying if you own an Android tablet. A tablet experience is best enjoyed in landscape mode in my opinion. But now and then some pesky app would force me to turn the tablet in my hand because the app opens up in portrait mode. Thankfully there are quite a few apps on the Play store to get rid of it. Today we show you how you can manage individual app rotations with Rotation Manager by Meerkat.
The app has a few not so commonly known rotation options as well so it can get a bit confusing for first-time users, in case they try to understand that. Otherwise, the app is quite straightforward to use. But that’s what we’re here for. To make things easier for our readers.
Install Rotation Manager – Control
Of course, the very first thing you will need is to install Rotation Manager on your Android device. Hopefully, a how-to-install-an-app-from-the-Play Store tutorial is not necessary.
[googleplay url=”https://play.google.com/store/apps/details?id=com.meerkat.rotationmanager”/]Manage individual app rotations with Rotation Manager – Control

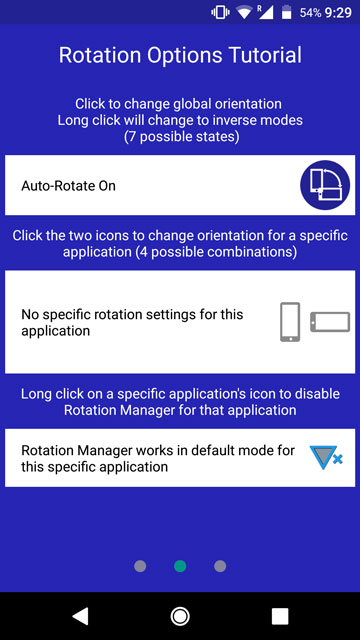
When launching the app for the first time, you will be greeted by a few tutorial pages that you can also access at a later time from the app, in case you need any help. Just swipe left to the next page and tap twice on the blue icon next to the text Auto Rotate On.
Must read: 5 Must-Have Utility Apps for Android
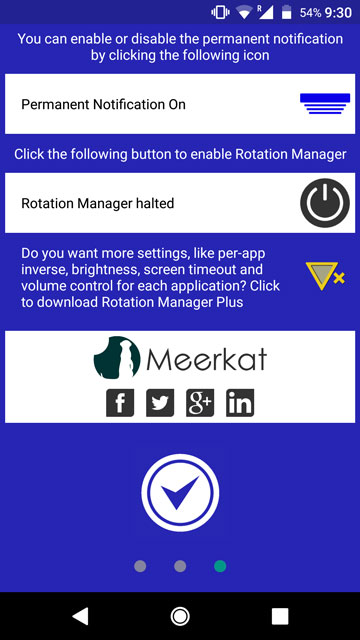
The text should change to Forced Portrait. This sets portrait mode as the system default, letting you set other rotations for certain apps. Similarly, on the next screen, you can choose whether to allow the app a persistent notification. It is enabled by default. On earlier Android versions, a persistent notification was necessary to keep an app running in the background. Otherwise, Android would kill them sooner or later. However, since Android 5.0, we’ve never experienced any such issues even with persistent notifications turned off for any apps.
Next, enable Rotation Manager by tapping the power button icon. You will be then redirected to the App Usage Access settings page since the app will need to monitor your app usage in order to provide rotations. Scroll through the list, find Rotation Manager, tap on it and allow access. Return to the app once that is done and tap on the check symbol at the bottom.

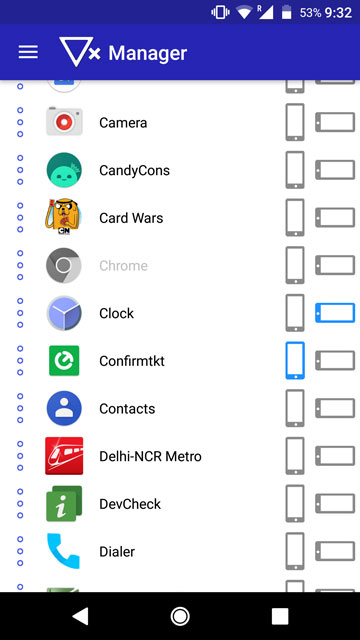
All you have to do now is tap the portrait or landscape icons next to the apps, thus locking them in either landscape or portrait mode respectively. The allowed rotations are highlighted in blue. You can also select both landscape and portrait modes for an app. This will allow (or is some cases, force) the app to auto rotate. In case an app behaves unexpectedly due to forced rotations, you can long press on its icon to disable rotation manager for the app. For instance, Chrome in the above screenshot has been left out. Only for a demonstration, of course. It works perfectly fine with rotation manager otherwise.
Don’t miss: Tips to Reduce Data Usage on Android
There’s also a paid version of the app called Rotation Manager Control ++ that allows you to set brightness levels, sound levels, and screen timeouts for each app.
Rotation Icons
A floating action button at the bottom allows you to change the default rotations. The icons can be a bit confusing, but you can see the instructions anytime again from the side drawer menu. But for your convenience, here are the icons and what they mean.
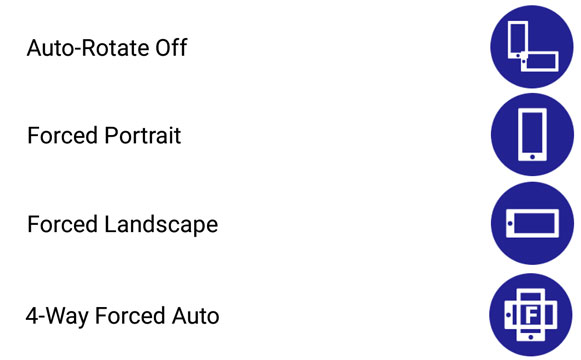
4-Way Forced Auto means rotations are allowed in all directions, that is at 90-degree, 180-degree, 270-degree and 360-degree. This can be really useful for when playing games that are locked to a certain screen rotation by design, although for no particularly advantageous reasons. Having faced such games, I can tell you it is very annoying, especially when feeling lazy.
Did you try Rotation Manager? What did you think about it? Let us know


Join The Discussion: