The Galaxy A9 is yet another mid-range smartphone from Samsung. It’s powered by Qualcomm Snapdragon 652 chipset coupled with 3GB RAM which is enough to meet the daily requirements of any Android user. However, most Android users want to get the maximum out of their smartphone. You need to root your device to explore the complete potential of your device. After rooting, you can install the Xposed framework to change your device to your liking. noknok79 from XDA has shared the TWRP recovery for Galaxy A9 SM-A9000 using which you can root Galaxy A9.
This tutorial is only meant for Galaxy A9 with model number SM-A9000. So, don’t try on any other device unless you want to brick it. You need to be on the latest firmware on your device to eliminate any hassles. In this tutorial, first, we’ll install the TWRP recovery on your device using Odin tool. Then, we will root your device by flashing SuperSU Zip from the TWRP recovery. So, download the required files from below and follow the tutorial to root Galaxy A9.
Prerequisites
- Download Odin tool: Odin3_v3.10.6.zip
- Install the latest Samsung USB drivers on your PC.
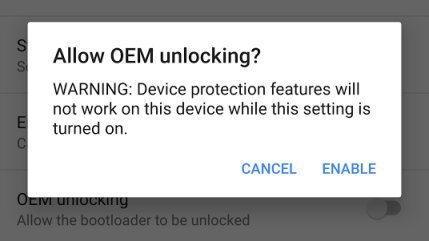
- Go to Settings » About phone » Build number and tap it 7 times to enable Developer options on your device. Then go back to Settings » Developer options and enable USB Debugging and OEM unlocking.

- Make sure your Galaxy A9 has more than 50% battery left before you jump into action.
- Backup your device storage, Contacts, SMS etc. using Google Sync service or any third-party app.
Downloads
- TWRP recovery for Galaxy A9: A9000-TWRP-PA7_kernel.tar | Mirror
- SuperSU Zip: BETA-SuperSU-v2.74-2-20160519174328.zip
How to Install TWRP Recovery on Galaxy A9
- Download the Odin Zip and extract it on your PC. Also, download the TWRP (.tar) file and place it in the same folder where you extracted Odin.
- Boot into download mode. To do this:
- Power off your device and wait until it’s completely turned off.
- Press and hold Power + Home + Volume Down buttons together.
- When you see the warning screen with an exclamation sign, press the Volume up key.
- Double-click the Odin3 vx.xx.exe file. This will open an Odin window.
- Connect your Samsung device to the computer using the USB cable provided by the OEM.
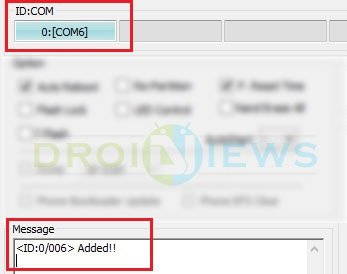
- As soon as you connect the device the ID:COM port on Odin will turn Blue or Yellow depending on the Odin version. You’ll also see “Added!!” message to indicate successful connection.

- Now click the AP button in Odin. Navigate to the TWRP recovery file and select it.
- In the options section, make sure that only the F. Reset Time box is checked and everything else is unchecked.
- Click the Start button in Odin to start the installation which might take a few seconds.
- A successful Odin flash is indicated by PASS! or RESET! message.
How to Root Galaxy A9
- Boot into recovery mode. To do this:
- Power off your device.
- Press and hold Power + Home + Volume Up buttons together and release them as soon as you see the Galaxy logo on the screen.
- While in TWRP, transfer the downloaded SuperSU Zip to your device in MTP mode.
- Choose the Install option from the recovery menu and flash the SuperSU zip from the file manager.
- Once the flashing process is complete, reboot the device.
If you like to have systemless root on your device, follow the below-linked tutorial to root your device using Magisk.
Once you’ve rooted your device, you can modify your device using mods and root-specific apps.


Join The Discussion: