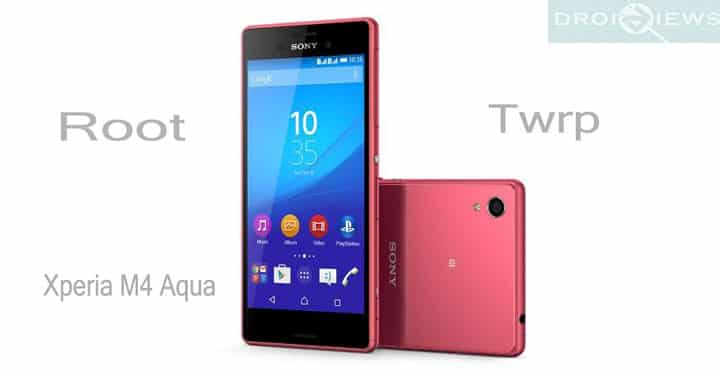
As the name suggests, the Xperia M4 Aqua is a waterproof Android device and comes with some good enough specifications. The smartphone has a 5-inch display with 720p HD display and is powered by 1GHz processor alongside 2GB RAM. Like most of the Sony devices, it comes with an amazing 13-megapixel rear camera. To make things even better, we can root Xperia M4 Aqua and flash TWRP recovery that will help you install custom packages on your device.
First, you will need to flash the TWRP image onto your device using the usual fastboot method. Once you install a custom recovery, you can then flash the SuperSU package in order to gain root access on your device. Before we begin, you need an unlocked bootloader on your Xperia device. We already have the guide available for that purpose. Moreover, you need to set up ADB and fastboot environment on your PC for this method to work successfully. If you are new to this process, then we will help you successfully install a custom recovery and finally root your device.
During this procedure, you will need to mount the partitions manually. There is no GUI as Sony has not been able to provide sources to build it. Moreover, there is external SD card support. Hence, you will need to mount the partitions manually issuing some commands in ADB shell. It’s recommended that you read the tutorial first and make a wise decision. So let’s begin with the tutorial.
Warning: Warranty may be void if you root or install TWRP on your device. We, at DroidViews, won’t be liable for any damage to your device whatsoever. We won’t be held responsible if you brick your device. Reader’s discretion is advised.
Downloads
You will need to flash a custom recovery like TWRP in order to flash the SuperSU file. That way, you will enjoy full root access almost permanently.
- Download | TWRP recovery for Xperia M4 Aqua (File: M4Aqua-lockedTWRP-0.1-installer.zip)
- Download | SuperSU v2.46 (File: SuperSU-v2.46.zip)
Backup Apps and Data
While this process may not wipe any of your data, a backup is highly recommended. Once you install a custom recovery like TWRP, make sure you backup your system, data, etc. from the recovery. It will be helpful in case anything goes wrong.
Prerequisites
- This procedure is compatible with Xperia Aqua M4 E2303 variant and has been confirmed working on E2303, E2306, E2333, E2353, E2363.
- Unlocked bootloader is required on Xperia M4 Aqua to install a custom recovery like TWRP on your device.
- Set up ADB and Fastboot using platform-tools.zip on your computer.
- Install Sony USB Drivers on your computer.
- Open Settings> Developer options and enable USB Debugging on your device.
- Go to Developer options and enable Allow OEM unlock, if applicable.
Root Xperia M4 Aqua and Install Custom Recovery
- Make sure you have downloaded the recovery and suitable SuperSU zip files. Now transfer them to your PC to a place where you can easily locate it. If you run Linux, place it in the root directory.
- Make sure you have setup ADB and fastboot on your PC. Also, accept Always allow from this computer when you plug in the device for the first time to enable USB Debugging.
- Now power off your device and unplug it from your PC.
- Boot into the bootloader or fastboot mode. To do so, press and hold volume down and the power button simultaneously for 5-6 seconds and when the phone vibrates, press the volume down button repeatedly. The Sony logo will disappear and you’ll get a black screen. Alternatively, To boot into flash mode/fastboot, you will need to turn off the device. Hold volume up or volume down and then connect your device while holding the volume key.
- You will see the bootloader screen. Now connect your device to the PC using a USB cable.
- Navigate to the location where you have placed the recovery file. Rename the recovery file to a simple one, like recovery.img. While the folder with recovery.img file is open, right-click on an empty space and select “Open command window here” option to launch a cmd window.
- Now type the following in the command prompt to check your device connectivity
fastboot devices
- Now flash the custom recovery. Use the following command for that.
fastboot flash recovery recovery.img
- The custom recovery will now be installed on your device. Don’t boot into TWRP just yet.
Now the TWRP recovery is installed. However, you will need to mount the partitions manually. There is no GUI as Sony has not been able to provide sources to build it. Moreover, there is no external SD card support. Hence, this remains the only option so far. So let’s continue with the mount procedure.
- Connect your cable, make sure you have ADB and drivers installed.
- It’s better to use Linux OS for this purpose. However, the command prompt should work just fine. In your terminal or dos window issue the following commands:
adb shell
- You will get a prompt like ~ #
- Now issue the following three commands:
mount -w /dev/block/platform/7824900.sdhci/by-name/system /system
mount -w /dev/block/platform/7824900.sdhci/by-name/userdata /data
mount -w /dev/block/platform/7824900.sdhci/by-name/cache /cache
- Now you will have the partitions mounted. You can now proceed to flash your zip files. As we don’t have external SD card support, we will use the sideload method. Issue the following command:
twrp sideload
- ADB shell will exit. Now we are ready to install the SuperSU zip file and gain root access. Issue the following code:
adb sideload <path_to_zip>
- Path to zip on your computer without the < > For instance, if you have placed SuperSU at C:\Downloads\SuperSU.zip then type:
adb sideload C:\Downloads\SuperSU.zip
- Once the operation completes, issue the following command:
adb reboot
- Now unplug your device and use the SuperSU application to grant root access.
Make a complete backup from the recovery once installed. You can boot into TWRP by turning your device off and then press and hold volume down and power keys at the same time. For more support like driver issues or memory problems, you can visit the XDA forum thread. Verify root using the root checker app.
[googleplay url=”https://play.google.com/store/apps/details?id=com.joeykrim.rootcheck”/]Unlock bootloader:
How to Unlock Bootloader on Sony Xperia M4 Aqua
For queries, comment down below. If we have helped you, then like and share us on social platforms. If you need help with other devices, let us know.
fastboot flash recovery recovery.img when i enter this it says it cant load recovery.img why? i downloaded it form your link
i had root access then my phone died and now its gone but still have supersu any idea how to fix this? ive tried the whole process again