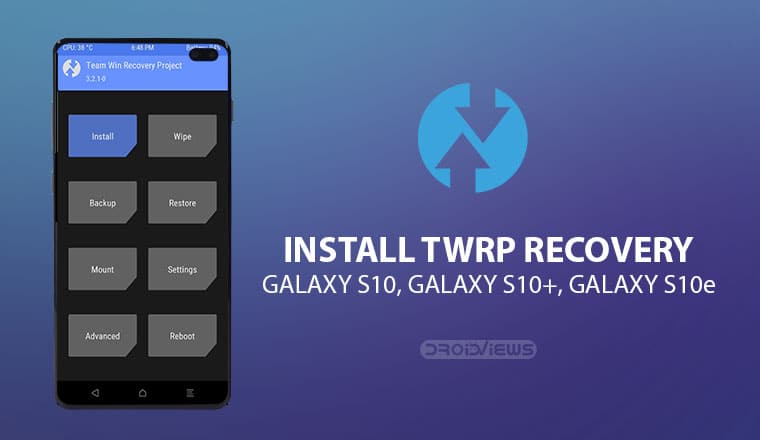
Only a few days ago we shared a method to root Galaxy S10, Galaxy S10+ and Galaxy S10e using Magisk. The method did not require TWRP. TWRP recovery is now available for the three devices, however. It’s an unofficial build of TWRP and has been pre-patched with Magisk. That means when you install these TWRP builds, your device will be automatically rooted. Here’s how to install TWRP on Galaxy S10, Galaxy S10 Plus, and Galaxy S10e.
Warning
- When you flash a custom recovery like TWRP, KNOX will be tripped. Meaning unless the laws in your country force Samsung to provide warranty regardless of the software status, your warranty is void.
- You will no longer be able to install OTA updates from Samsung and that includes the Android 8.0 Oreo update Samsung has promised.
- The unofficial TWRP is not exactly bug-free. Although it does work well in most cases there is some room for improvement.
Also, make sure that in the rare case that things go south, you own up to the responsibility. DroidViews is not responsible for anything that might or might not happen to your device while following the guide. That said, the method described below has been tested by users and has been found to work.

Requirements
The guide below works for any Galaxy S10 and Galaxy S10+ as far as the SoC powering it is an Exynos chip. But before you can install TWRP and reap the benefits, you’ll have to make sure your device checks the following boxes.
- Your Galaxy S10, Galaxy S10+, and Galaxy S10e should have an unlocked bootloader. After you’ve unlocked the bootloader, sign in to the device again. Make sure you connect the device to the internet during the signup process but skip the Google sign in. In the developer options, make sure the OEM unlock option is grayed out.
- Make sure the device has at least 50% battery remaining before you begin the process.
- You must already have Samsung’s latest USB Drivers installed on your PC.
- Also, ensure that OEM Unlock and USB debugging have been enabled on your device. You can find both the options in Settings > Developer options. Developer options can be enabled by going to Settings > About phone and tapping on the Build number several times.
- While using Odin3, disable Samsung Kies if you have it installed on your PC.
- It would be wise to back up all your important data just in case.
See also: Turn Galaxy S10 into Google Pixel (Works on Other Devices Too)
Downloads TWRP for Galaxy S10
- TWRP: Galaxy S10e, Galaxy S10, Galaxy S10+
- Odin
- Encryption disabler (transfer to an external SD card or USB OTG and plug it into your phone)
Install TWRP recovery on Galaxy S10, Galaxy S10+, and Galaxy S10e
Having downloaded the required files from above, you’re all set to install TWRP on Galaxy S10, S10 Plus, and S10e. Just follow the steps given below:
- Download TWRP for the Galaxy S10, S10+ or S10e from above.
- Download Odin and extract the contents of the zip.
- Reboot your phone to recovery mode.
- Power it off.
- Press Bixby + Volume Up + Power key.
- Factory reset the device from recovery.
- Now boot your phone to the Download mode. To do so, power it off and then press and hold the Bixby and Volume Down buttons together. While holding the two buttons press and hold the power button to switch on the device. Leave the keys once you see a message displayed on the screen and press Volume Up to boot into download mode.
- Launch Odin on your PC.
- Connect your phone to the PC with a USB cable and make sure the connection isn’t loose. The ID:COM port on Odin should turn blue if your device is detected and you’d see Added! in the Log box. If not, better check if you have the drivers installed correctly.
- Click on the AP button on Odin and select the Magisk patched TWRP file which you downloaded earlier.
- Make sure that under the Options tab, Auto Reboot and F . Reset Time options are unchecked.
- Click on the Start button in Odin to initiate the installation.
- A ‘PASS!‘ message will appear once the installation is successful.
- Reboot the device into recovery mode.
- Exit download mode by pressing Power + Volume down.
- As soon as the screen turns off, press Bixby + Volume Up + Power key.
- Continue pressing the Volume Up button until you see the stock recovery menu.
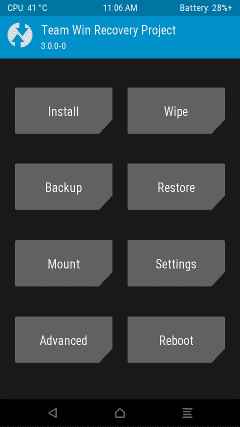
- In TWRP, select Install and then select the Encryption disabler zip file.
- Swipe at the bottom to flash the file.
- Go to Reboot and select Recovery to reboot your device with Magisk root.
You have successfully installed TWRP on your Galaxy S10 and can now flash mods and custom ROMs o make the most of your device!
Read Next: Automatically Hide Navigation Bar on Galaxy S10


Join The Discussion: