Installing stock or official firmwares on Samsung devices is way easier that performing the same task on devices from other brands. You only have to get a utility called Odin, which has been developed by Samsung and is easily available unofficially, download the firmware file and go through a few steps to flash a firmware on any Galaxy phone or tablet.
Anyway, however simple such procedures may be, there always are the chances to get into some problem or mess. While most of the Odin flashes end up nicely with a PAAS! message, sometimes the firmware installation don’t end up as expected and fails because of some issue.
In the past, I wrote a bunch of tutorials for fixing different issues that are faced by users while trying to install a firmware on Samsung Galaxy device using Odin. Below, I’ve listed a few of them:
- How to Recover from Boot loop after Installing Samsung Firmware
- Fix Invalid Ext4 Image Error in Odin While Installing Firmware on Samsung
- Fix “Firmware upgrade encountered an issue” Error on Galaxy Devices
- Fix “Recovery is not Seandroid Enforcing” Error on Samsung Galaxy Devices
If you have been trying to install a firmware file on your Samsung device and the firmware installation fails because of hidden.img issue, you can use this tutorial and fix the problem.
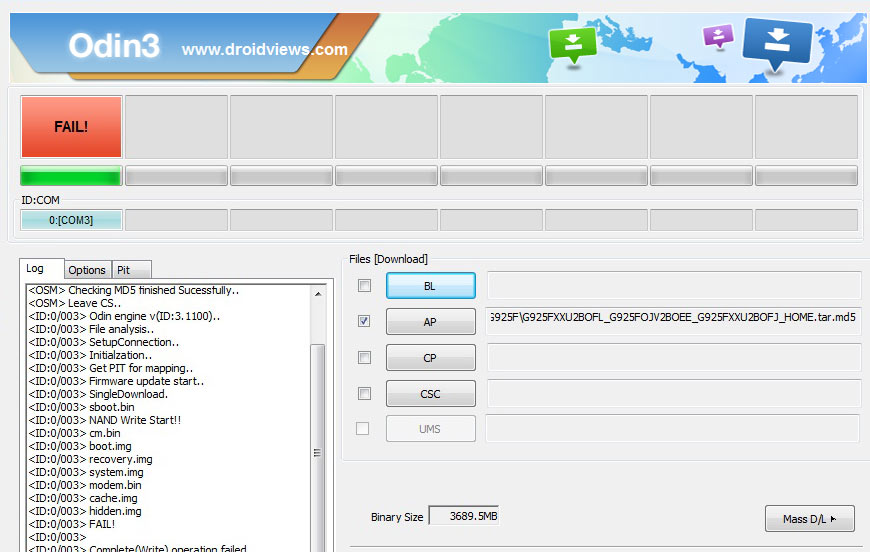
When you get this error while installing the stock Samsung firmware, you will see the following message in the Odin log:
<OSM> Enter CS for MD5..
<OSM> Check MD5.. Do not unplug the cable..
<OSM> Please wait..
<OSM> G920FXXU1AODE_G920FOXE1AODE_G920FXXU1AODE_HOME.tar .md5 is valid.
<OSM> Checking MD5 finished Sucessfully..
<OSM> Leave CS..
<ID:0/004> Added!!
<ID:0/004> Odin engine v(ID:3.1005)..
<ID:0/004> File analysis..
<ID:0/004> SetupConnection..
<ID:0/004> Initialzation..
<ID:0/004> Get PIT for mapping..
<ID:0/004> Firmware update start..
<ID:0/004> SingleDownload.
<ID:0/004> sboot.bin
<ID:0/004> NAND Write Start!!
<ID:0/004> cm.bin
<ID:0/004> boot.img
<ID:0/004> recovery.img
<ID:0/004> system.img
<ID:0/004> modem.bin
<ID:0/004> cache.img
<ID:0/004> hidden.img
<ID:0/004> FAIL!
<ID:0/004>
<ID:0/004> Complete(Write) operation failed.
<OSM> All threads completed. (succeed 0 / failed 1)
The solution of firmware installation failure in Odin because of hidden.img is very easy and here’s how you can fix it.
Prerequisites
- The stock Samsung firmware file with .tar.md5 extension.
- Install a zip extractor program like 7-Zip if you don’t have it installed on your computer already.
Fixing Odin Firmware Installation Failed at Hidden.img Issue
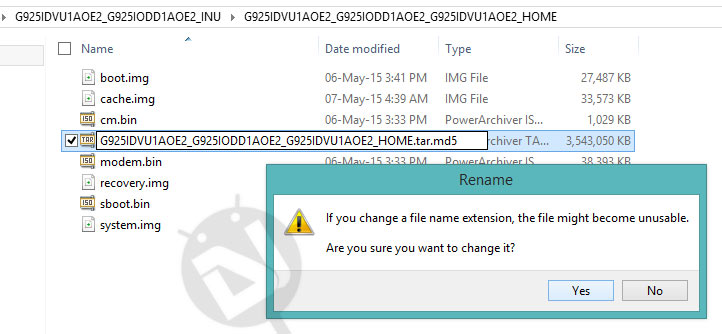
- Open the folder where you have saved the firmware file. Then click the View option in Windows Explorer menu and enable File name extensions option there.
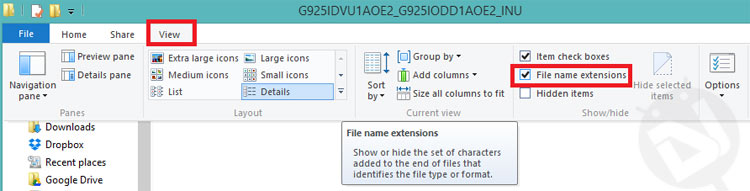
- Now you will be able to view and edit file extensions. Right-click the firmware file and select Rename option. Now remove the .md5 extension from the file name so that it end with .tar only (see below)


- Now right-click the firmware file, highlight 7-Zip and select Extract to “firmware file name” option.
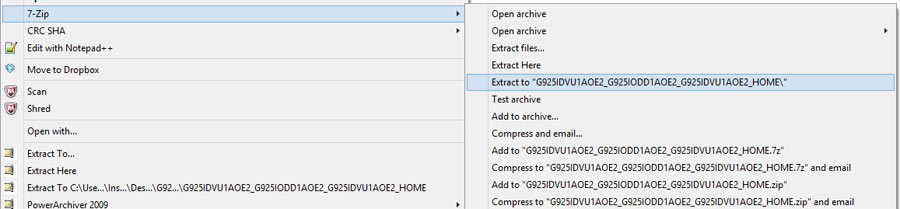
- Since the firmware file is big, it will take a few minutes to extract.

- After extracting the firmware, open the extracted folder and make sure that the system.img file size is not 0 KB. If that is the case, use a different Zip extractor.
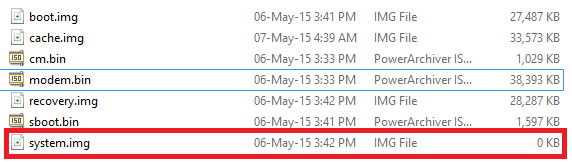
- Anyway, look for the hidden.img file in the folder and delete it.

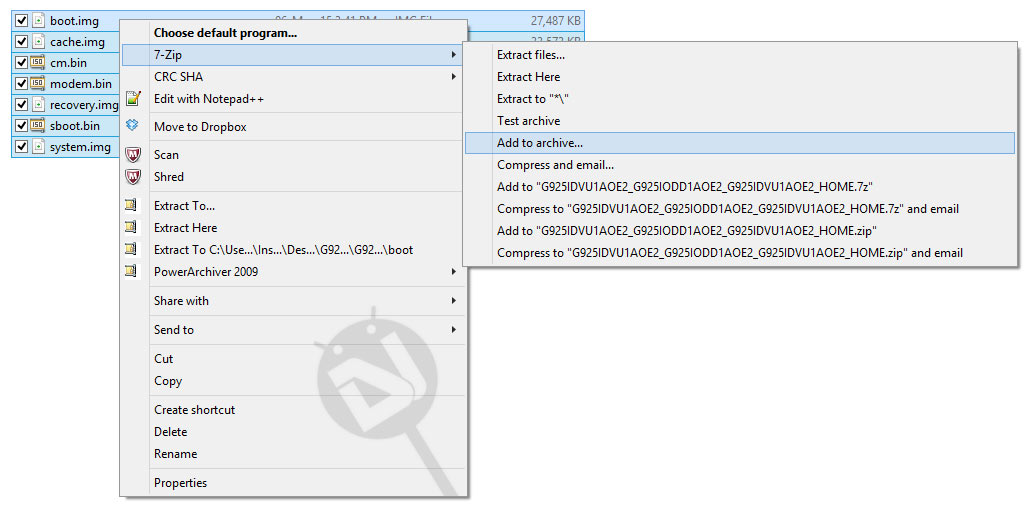
- Now select all files in the folder by pressing Ctrl+A keys.
- Right-click on the files and select 7-Zip> Add to archive… option.
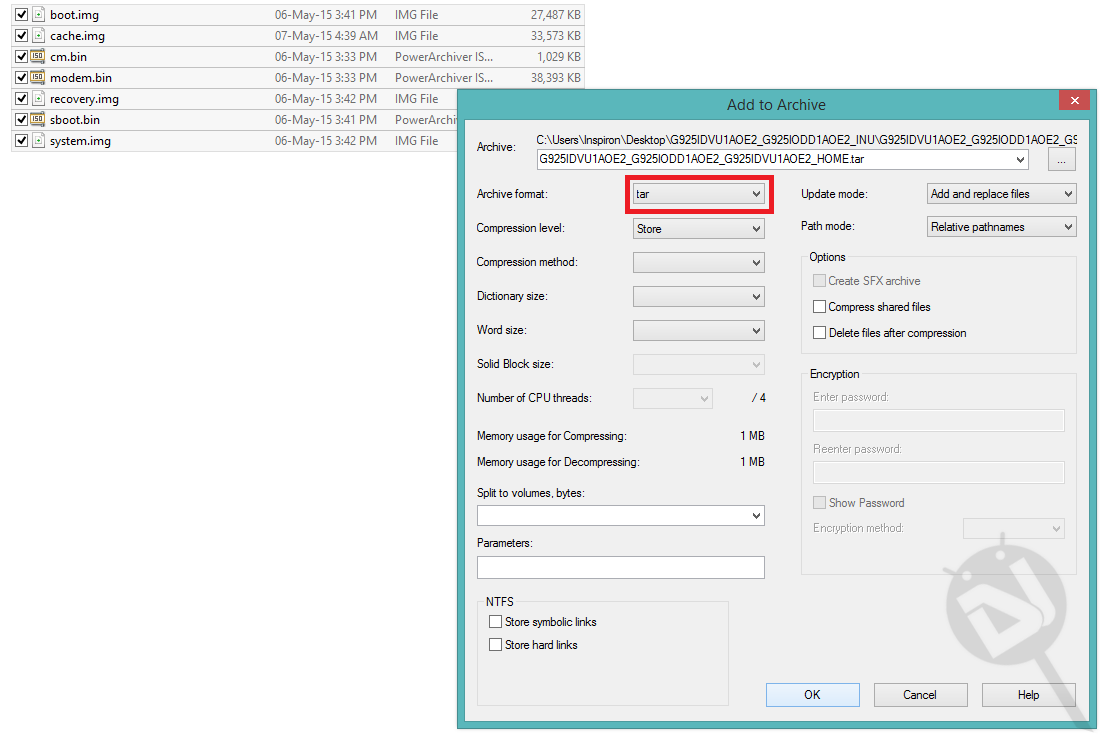
- A new window will pop up. Click the drop-down menu in front of Archive format and select tar and click OK.
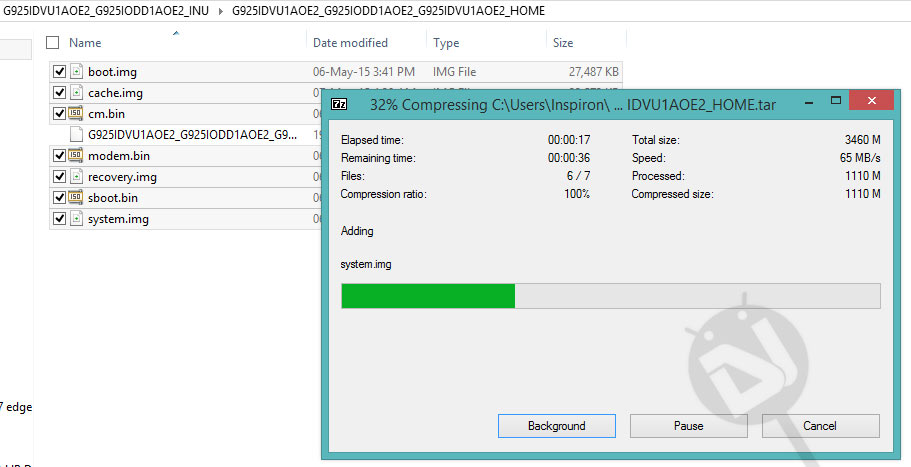
- 7-Zip will start compressing the files. Wait until the compression finishes.
- When the compression is done, you’ll get a new file with firmware name and .tar extension. Right-click this file and add .md5 extension so that you have .tar.md5 extension.

- Click Yes when prompted to ask if you want to save the changes made in the firmware file name.
- You now have your firmware ready for installation.
Done! You are now all set to install the firmware in Odin without getting failed firmware installation because of hidden.img. You can refer to our super detailed tutorial on installing stock firmware on Samsung devices.
With a hope that this tutorial will help users getting the error or failed message while installing firmware due to hidden.img, I wind up the guide here. If you need any help with the procedure described above, please let us know. Thanks!


U are the best man , thanks
Thank you. Works perfectly on my Note 4 (SM-N910G)
You are a life saver. I almost gave up on my phone as I tried everything in every forum I have searched until I come across your post. It worked magically and finally, I have my Samsung S6 back to life. Thanks!
Thanks for the appreciation! Please follow us on Social Media for more updates.
Thank you its work perfect
Glad to know it worked for you!
Hi Rakesh
I met exactly the issue you described and try to resolve here…
I followed your tutorial and i notice that if I delete the hidden.img file, when launching the MD5 in Odin, I obtained and error with binary unvalid (checksum issue like ?)
How can I solve this issue… and hidden.img failure…
Thank you in advance for your help !
Cheers from France !
Rémy
Remove the .md5 extension from the firmware file and then try installing the firmware. Use Odin 3.09.
Thank you Rakesh… I did not say that before… I had a crash down of my computer and today by surprise I saw again your helping message… I Did not have time to test, I’m exactely at the same situation as 4months ago
I had to say that ODIN and my smartphone is not my priority now as I created my own COmpany… but I would have wanted to say thank you for your generosity in helping biginners as me just for free… Thnak you so Much !
Regards
Rémy
You’re always welcome, Remy!
Hi,I’m using samsung galaxy s4 mini and i followed your steps.When i am trying to select it it says MD5 value is invalid….
You can do 2 things:
1. Redownload the firmware file and verify the MD5 checksum: https://www.droidviews.com/check-md5sum-of-a-file-on-windows-mac-and-linux/
2. Enable ‘view file extension’ option in Windows explorer (see above), remove ‘md5’ extension from the firmware file and try installing it.
The second variant works! You are genious! Many thanks!
Glad to know it helped you!