Rooting is a trend for those who like to experiment and are ready to sacrifice the official support. The process of rooting ranges from being easy to tricky, depending upon what manufacturer’s device you’re using. Sony is counted to be one of Android smartphone manufacturers who likes pushing the walls up high, and hence it’s quite a deal for users to unlock its devices to the unofficial world.
You may be familiar with the Xperia M2, and if you’re not, it is Sony’s mid-range smartphone that beholds a lot of capabilities matching that of a high-end device. This includes a 4.8 inches Corning Gorilla Glass display, 8 MP high res Camera, Quad-core Cortex-A7 1.2 GHz processor and an Adreno 305 GPU. It is a choice for a bulk who prefer more in less price.
Keeping in mind that the device is capable of performing a lot better with Root permissions, we’re going to guide you through the process to Root Xperia M2 and Install CWM recovery on it.
Warning
The procedure described below is considered risky. We shall not be held liable if you damage your device during the process. Understand the risk and proceed further.
Preparations
- Install Sony USB drivers: Click here
- Install Android SDK: Click here
- Enable USB Debugging: Click here
- Backup your device, this includes storage, SMS, contacts, calendars, etc.
- Charge your device to at least 60% battery level
- Unlock Xperia M2 bootloader using Official Sony online tool: Click here
Downloads
SuperSU flashable package: UPDATE-SuperSU-v2.02.zip
Root Xperia M2 and Install CWM Recovery
- Download the CWM image file from the downloads section below.
- Open the folder location where the image file has been downloaded.
- Press SHIFT key and Right-click on an empty space inside the folder
- From the pop-up menu that appears, click on Open command prompt here.
- Switch off your device.
- Now while holding down the Volume Down key, press the Power key until the Blue LED will flash. Your M2 will enter the fastboot mode.
- Connect your Xperia M2 to the PC via USB cable.
- Type and enter the following command into the CMD window to flash the CWM image file:
fastboot flash boot cwm.img - Once the flashing procedure completes, enter the command below to reboot the device:
fastboot reboot
- When the device has booted normally into the OS, type in the command below to reboot the device into CWM recovery mode:
adb reboot recovery
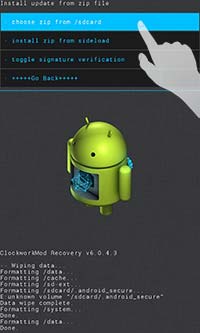
- Tap on install zip > choose zip from /sdcard and select the UPDATE-SuperSU-v2.02.zip.
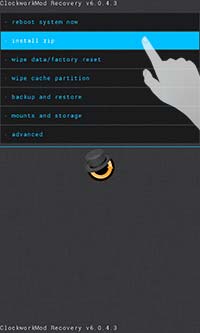
- Tap on reboot system now when the process completes.
Congrats, you now have CWM custom recovery installed on your Xperia M2, which can right away be put to use now to Install ROMs, Kernels or tweaks.


can’t open cwm.img . any solution ? thx
after step 9, the phone screen keeps flashing and it wont turn on
same problem. any idea how to fix it?
it seems like there are a lot of gaps in this tutorial. I wouldn’t risk fucking up my phone… no, thanks.
Please share where we have not been upto the mark during this guide. We shall definitely improvise.
ok,do you think this will work for kitkat 4.4.4?
I almost bricked my phone yesterday so I’m pretty skeptic.
unzipped supersu should go into sd card right?
It is confirmed to be working on 4.3.
And you don’t need to unzip the superSU. We haven’t stated anywhere to unzip the UPDATE-SuperSU-v2.02.zip. You have to transfer the zip file itself.
Again, if you’re running 4.4.x, avoid it. According to me it won’t harm anything and shall work. But i wouldn’t advice you to take any risk.
thanks, maybe I should downgrade to 4.3 then…
Yes, you may do that.
sorry to bother you, but I have another question. let’s say I downgrade and root my phone. will I be able to update to a newer version of android without losing root?
No, you will have to root it again. There are some OTA root keeper apps at the Play store but I am not sure if they will work on G3.
same problem, did you figure out how to fix it?