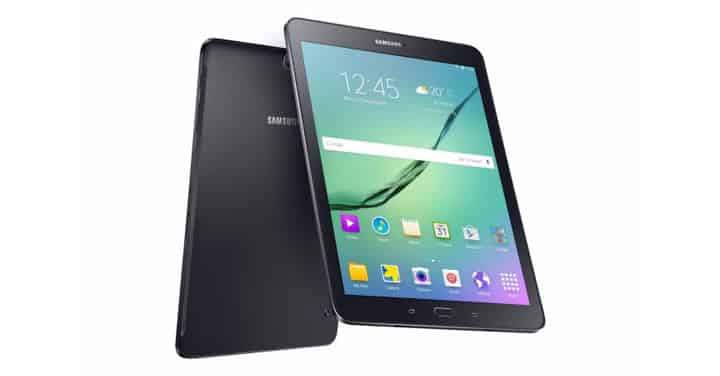
TWRP enables you to modify your system. Once you set up a custom recovery, you can root your device with SuperSU, flash mods, or even switch to a custom ROM like the popular CyanogenMod and more. A new build for the TWRP is available for Samsung Galaxy Tab S2 device and can be flashed easily using Odin. The TWRP build is compatible with SM-T710/715/810/815 variants of the device on both Android 5.0.2 and 5.1.1 Lollipop firmware. As CyanogenMod 12.1 build is available for the Tab S2, custom recovery is a must.
The recovery listed here has all the features and functionalities from TWRP including backup, advanced settings, mount and more. It works flawlessly on the Tab S2. However, a custom recovery will trip your Knox Counter, so be cautious. Here is a detailed tutorial that will help you install the latest TWRP recovery on your Samsung Galaxy tab S2 8.0 device using the Odin software.
Make sure you backup everything, before you proceed. So let’s begin with the tutorial.
Warning: Warranty may be void if you root or install custom packages on your device. We at DroidViews won’t be liable for any damage to your device whatsoever. We shall not be held responsible if you brick or damage your device. Reader’s discretion is advised.
Requirements
- Make sure you have the perfect device and variant. This tutorial is suitable only for Galaxy Tab S2 8.0 SM-T710/715/810/815 variants only.
- Enable USB Debugging on your android phone.
- Make sure you have Samsung drivers installed on your PC.
- Download the 7zip software to extract the zip file to get the firmware file with .tar.md5 extension.
- Make sure you have fully charged your Galaxy device or at least up to 60% of the battery.
Download Section
LOLLIPOP 5.0.2 ONLY:
LOLLIPOP 5.1.1:
Odin Software:
Backup Your Apps and Data
It is recommended that you backup your apps, contacts, messages, photos, videos and any other important data stored on the internal storage of your phone. Get some of our useful backup apps from the DroidViews archives. This will help you backup your device data easily. This process may not remove app and data, but it is highly recommended to backup everything before you proceed.
How to Install TWRP Recovery on Galaxy Tab S2 8.0
- Download the TWRP file for your Samsung Galaxy device. If it is a zip file, extract it to get the recovery with .tar extension.
- Now turn off your phone and boot it into the Download Mode. To do this, turn off your device and then press and hold Volume Down/Up + Home + Power buttons simultaneously for 2-3 seconds. When you see the warning screen with a yellow triangle sign, press the Volume Up/Down key to enter download mode or you can say Odin mode.
- Download the required Odin.zip file and extract the file on your PC. You will get the Odin_v3.09.exe file or older. Open it as an administrator to get to the Odin window. If the current version fails to install, try using an older version.
- Connect your Galaxy device to the computer using the USB cable.
- When you connect the device, the ID: COM port on Odin will turn Blue. You’ll also see“Added!!” message to indicate a successful connection.
- If in case Odin doesn’t detect your phone, troubleshoot the following:
- Reboot your phone and turn off USB Debugging and turn it on again.
- Try reinstalling the Samsung USB Drivers.
- Try changing the USB cable and connecting to other ports.
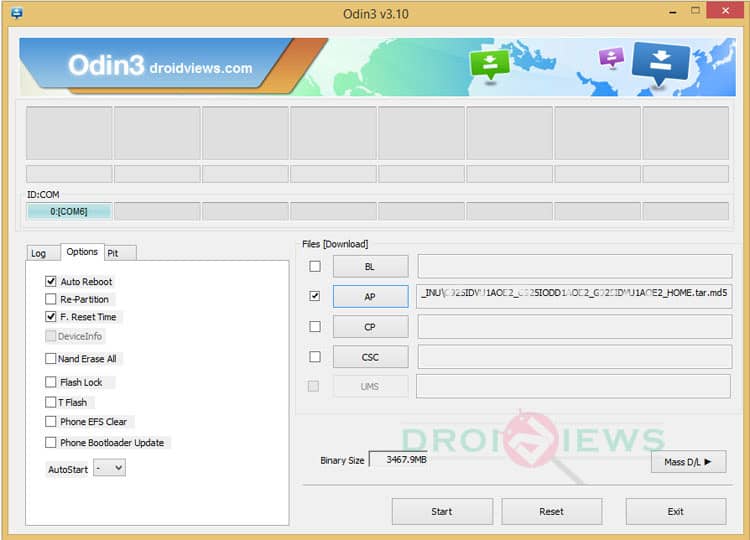
- Now click AP button on Odin and add the firmware file (recovery.tar.md5) If you are using older Odin version, select PDA.
- In the Options section, tick only the Auto Reboot and F. Reset Time checkboxes. (Do not, in any case, check Re-Partition box)
- Before you proceed to firmware installation on Odin, make sure everything is set according to the screenshot.
- Now, click the Start button on Odin to begin with the installation.
- Once you get a ‘PASS!’ message on Odin, your device will restart. It’s the green signal that indicates a successful installation. In case you get a ‘Fail!‘ message, make sure you go through all the procedure carefully and consider the requirements listed above.
- Now that you have successfully installed the custom recovery, you are ready to flash custom packages on your device and boot into it using the same button combinations as above.
Once into the custom recovery, it is recommended that you backup your current ROM. If you come across any boot loops or face any system errors, you can try a factory reset from the TWRP or if you want to return to stock, re-flash the stock firmware completely.
For queries, comment down below. Like and share us on social platforms. If you need help with other devices, let us know.


Join The Discussion: