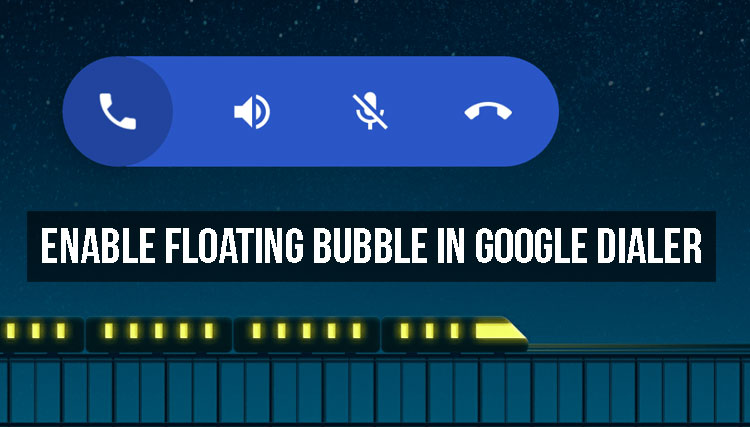
Google is currently testing an useful new feature called the floating bubble for its dialer app. The floating bubble will pop up whenever you are in a phone call and go to your home screen or switch to any other app on your phone.
It comes with common actions like loudspeaker mode, muting the microphone and hanging up your call. These actions will be revealed when you tap on the floating bubble and you can double tap on it to go back to your dialer app.
This new feature could prove to be useful for people who multi-task a lot. You can type your emails, chat with someone or even scroll through your Facebook feed while having full control over your calls. Previously, you cannot perform these functions if you leave the dialer app.
However, this new floating bubble feature is in the testing phase and Google has not rolled it out to the stable version of its Dialer app yet. But, if you want to test it out on your device, then you can follow the instructions below to install the Google dialer app on your device and enable the floating bubble feature.
Remember, for this to work without any issues, your phone has to be at least on Android 6.0 Marshmallow. Google dialer also comes with other extra features like caller ID, call blocking and location detection.
How to Enable Floating Bubble in Google Dialer Without Root
Step 1: Download Google Dialer Patched APK
- Google_Phone_11.0.164102751_Bubble_Patched_.apk
- ARM64 devices: Google_Phone_13.0.170513131_[Patched]_[Bubble].apk
Also read: How to Get Android Oreo Adaptive Icons on any Android
Step 2:
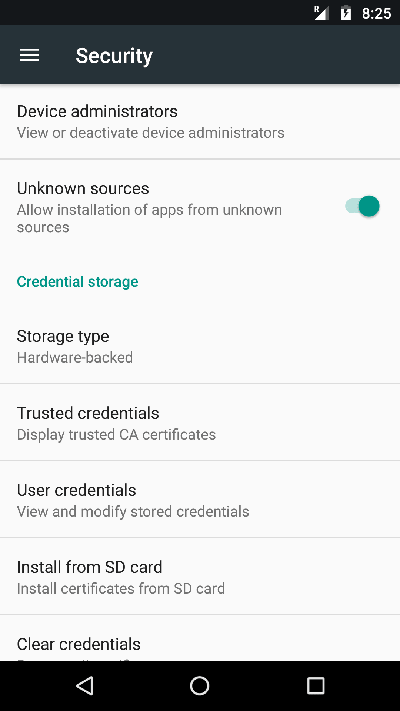
If this is the first time you are installing an APK file on your phone, then you have to enable installation from Unknown sources.
To do that, Go to Settings-> Security-> Unknown Sources and then enable it.
Step 3:
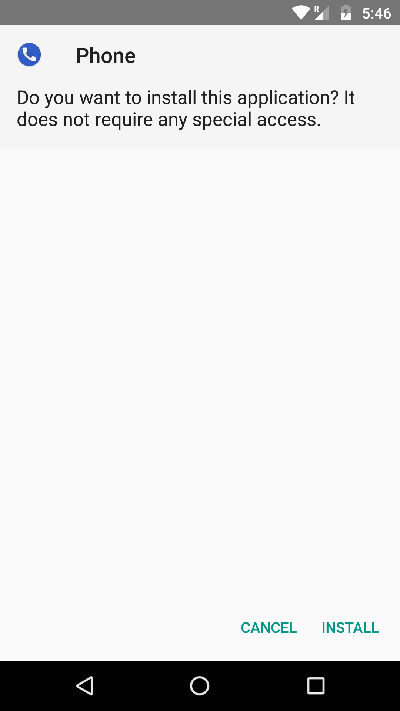
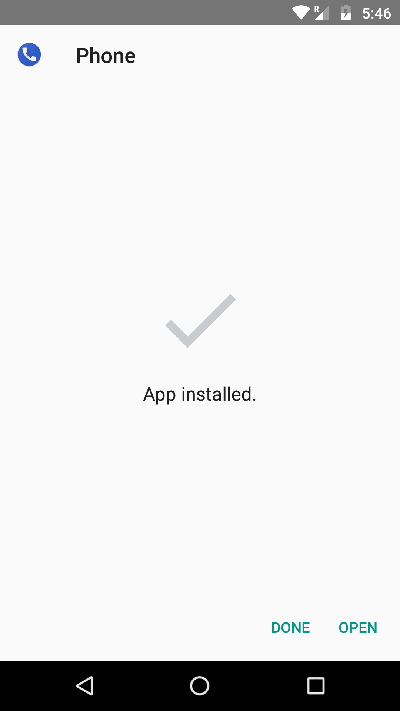
Now open the downloaded APK file and then select install. Once the installation is complete, open the Google Dialer app.
Step 4:
You have to enable a set of permissions now for the app to function properly and for the floating bubble feature to work.
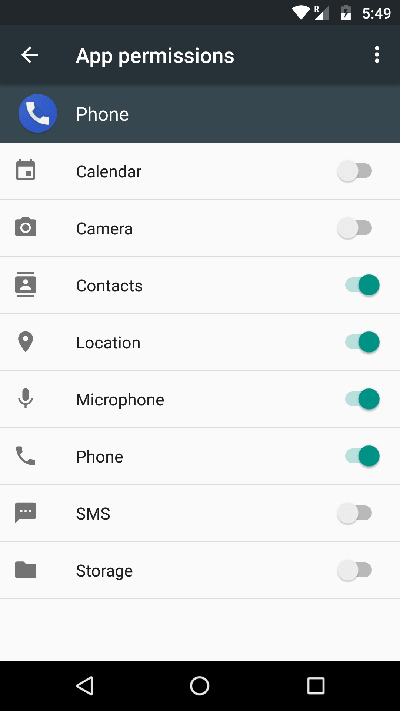
Go to Settings> Apps and then select the phone from the list.
Step 5:
Don’t miss: Respond to Notifications on the Fly with Notifly
Now click on the permissions option and then enable all the necessary permissions like phone, contacts, and microphone.
Step 6:
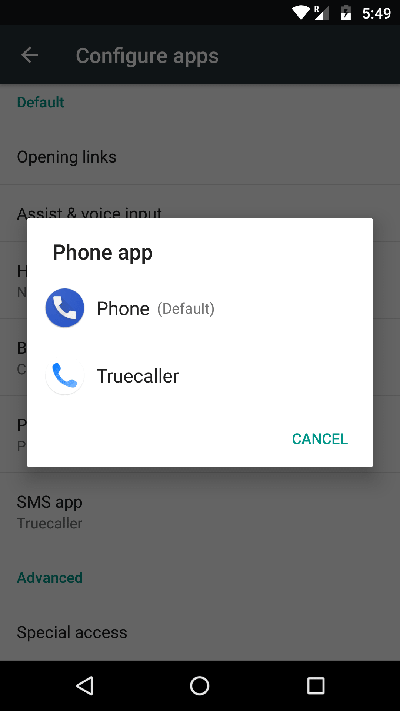
Now go back and then select the phone app option and then select the Phone as the default option.
Step 7:
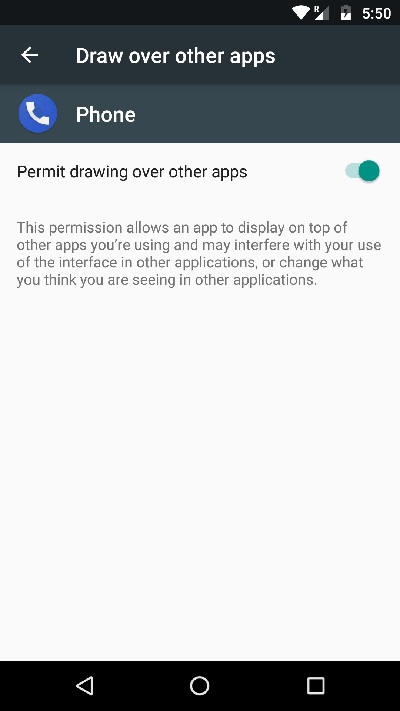
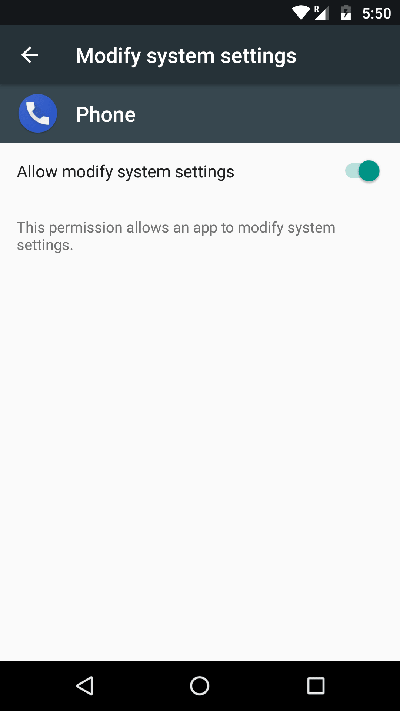
Once again go back and then select and enable Draw over other apps and Modify system settings for the floating bubble feature to work.
Step 8:
That’s it. Now you can place a call to anyone and once you leave the Google Dialer app, the floating bubble will automatically appear on your screen.

You can select it to access the common actions like loudspeaker mode and hold calls or double tap it to go back to the dialer app. You can also drag and move the floating bubble to place it anywhere on your screen.
Must read: Some Magisk Mods to Get You Started
If you have any doubts regarding this process, feel free to comment below! You can also visit the app development forum at XDA here to discuss the app and interact with the developer or the community members.
[relatedposts]


After clicking to install the APK it shows the status bar and then says “App not installed” with an X on the screen. Did not work. Running Android 8.0 official OS on pixel XL
Same here, I’ve tried it. Same issue
Try this APK.: https://drive.google.com/file/d/0B4zm5uCToKPOak1MWHJSeVdPSHM/view
Still not working
If you own the Google Pixel or any other ARM64 device, try the ARM64 version of the APK. You can find it linked above in the article.
Try to download from this link it includes both 32 and 64 bit version and it was updated today : https://www.apkmirror.com/apk/google-inc/google-phone/google-phone-12-0-167196395-release/