Xposed Module is a popular module for the smartphone enthusiasts who like to root their smartphone and customize the smartphone to our liking. Talking about Xposed Installer and the Xposed Module, we have known that the development of the famous Xposed Module came to a standstill last year as the developer behind Xposed was caught up in other commitments which delayed the release of Xposed for Android Nougat which came just before the release of Android Oreo, eventually. However, the developer behind Xposed has been very active ever since and we have seen that the Xposed Module for Android Oreo has already been released.
Now, we have already known that there is another alternative for Xposed which was released a few years ago and has become popular ever since. However, if you don’t know about Magisk then we will give you a brief overview of Magisk and the difference between Xposed. Now, the Xposed Module is a system-dependent method of customization which means that you will have to install the Xposed Module from your recovery which should be a custom recovery like TWRP. This means that you will have to unlock bootloader and install TWRP recovery in order to install Xposed Module.
However, Magisk, which is the best alternative to Xposed can be installed even on the Stock Recovery which means that it is a system-less method of customization and thus, installing Magisk on your smartphone will have no harms or effects which can not be guaranteed in the case of Xposed Module. Thus, people have been going towards Magisk Installer from Xposed due to its compatibility with Stock Recovery as well as the systemless approach.
Also, as we mentioned above, Xposed Module developer, famously known as rovo89 on XDA Forums, released the Xposed Module for Android Oreo along with the source code for the developers to port the Module. Thus, the developer of Magisk, topjohnwu, has released the Systemless version of Xposed which is compatible with Android 8.0 Oreo. Now, it is worth noting that this is not the first time that the systemless Xposed version has been released by the developer of Magisk but it is appreciable as it was released in just a few days after the official release of Xposed for Android Oreo.
Talking about Systemless Xposed for Android Oreo and its features, it should be noted that this module is present in Magisk Installer so you will need to have Magisk Installer in order to get Systemless Xposed for your device running Android Oreo and further.
You should also note that installing Systemless Xposed on your device will pass SafetyNet which will help to use applications like Android Pay, Samsung Pay and other banking applications that currently restrict access if you have a rooted device
The step by step guide to install Systemless Xposed from Magisk Installer can be found below so that you can get Xposed Module running on your device running Android Oreo systemless-ly.
Prerequisites
- You will need to compulsorily have Magisk installer on your device in order to proceed further with the installation. To install Magisk, follow our tutorial from here
- You need to have at least 50% battery on your device
- You should take a backup of data and other contents on your device in order to avoid losing data due to errors
Steps to install Systemless Xposed on Android Oreo
- First of all, you will need to complete the steps that have been mentioned in the Prerequisites section above. Also, it is compulsory to have Magisk installed on your device in order to continue this process
- Once you have completed all the Prerequisites, head over to the Magisk Manager application that will be installed on your smartphone and tap on it to open the application.
- After this, click on the hamburger icon ☰ on the top-left side of the Magisk Manager application which will open the menu of options from the left.
- From here, click on the Downloads option
- Now, scroll all the way down to the bottom to get to the Xposed Installer from the list of options from the Downloads section.
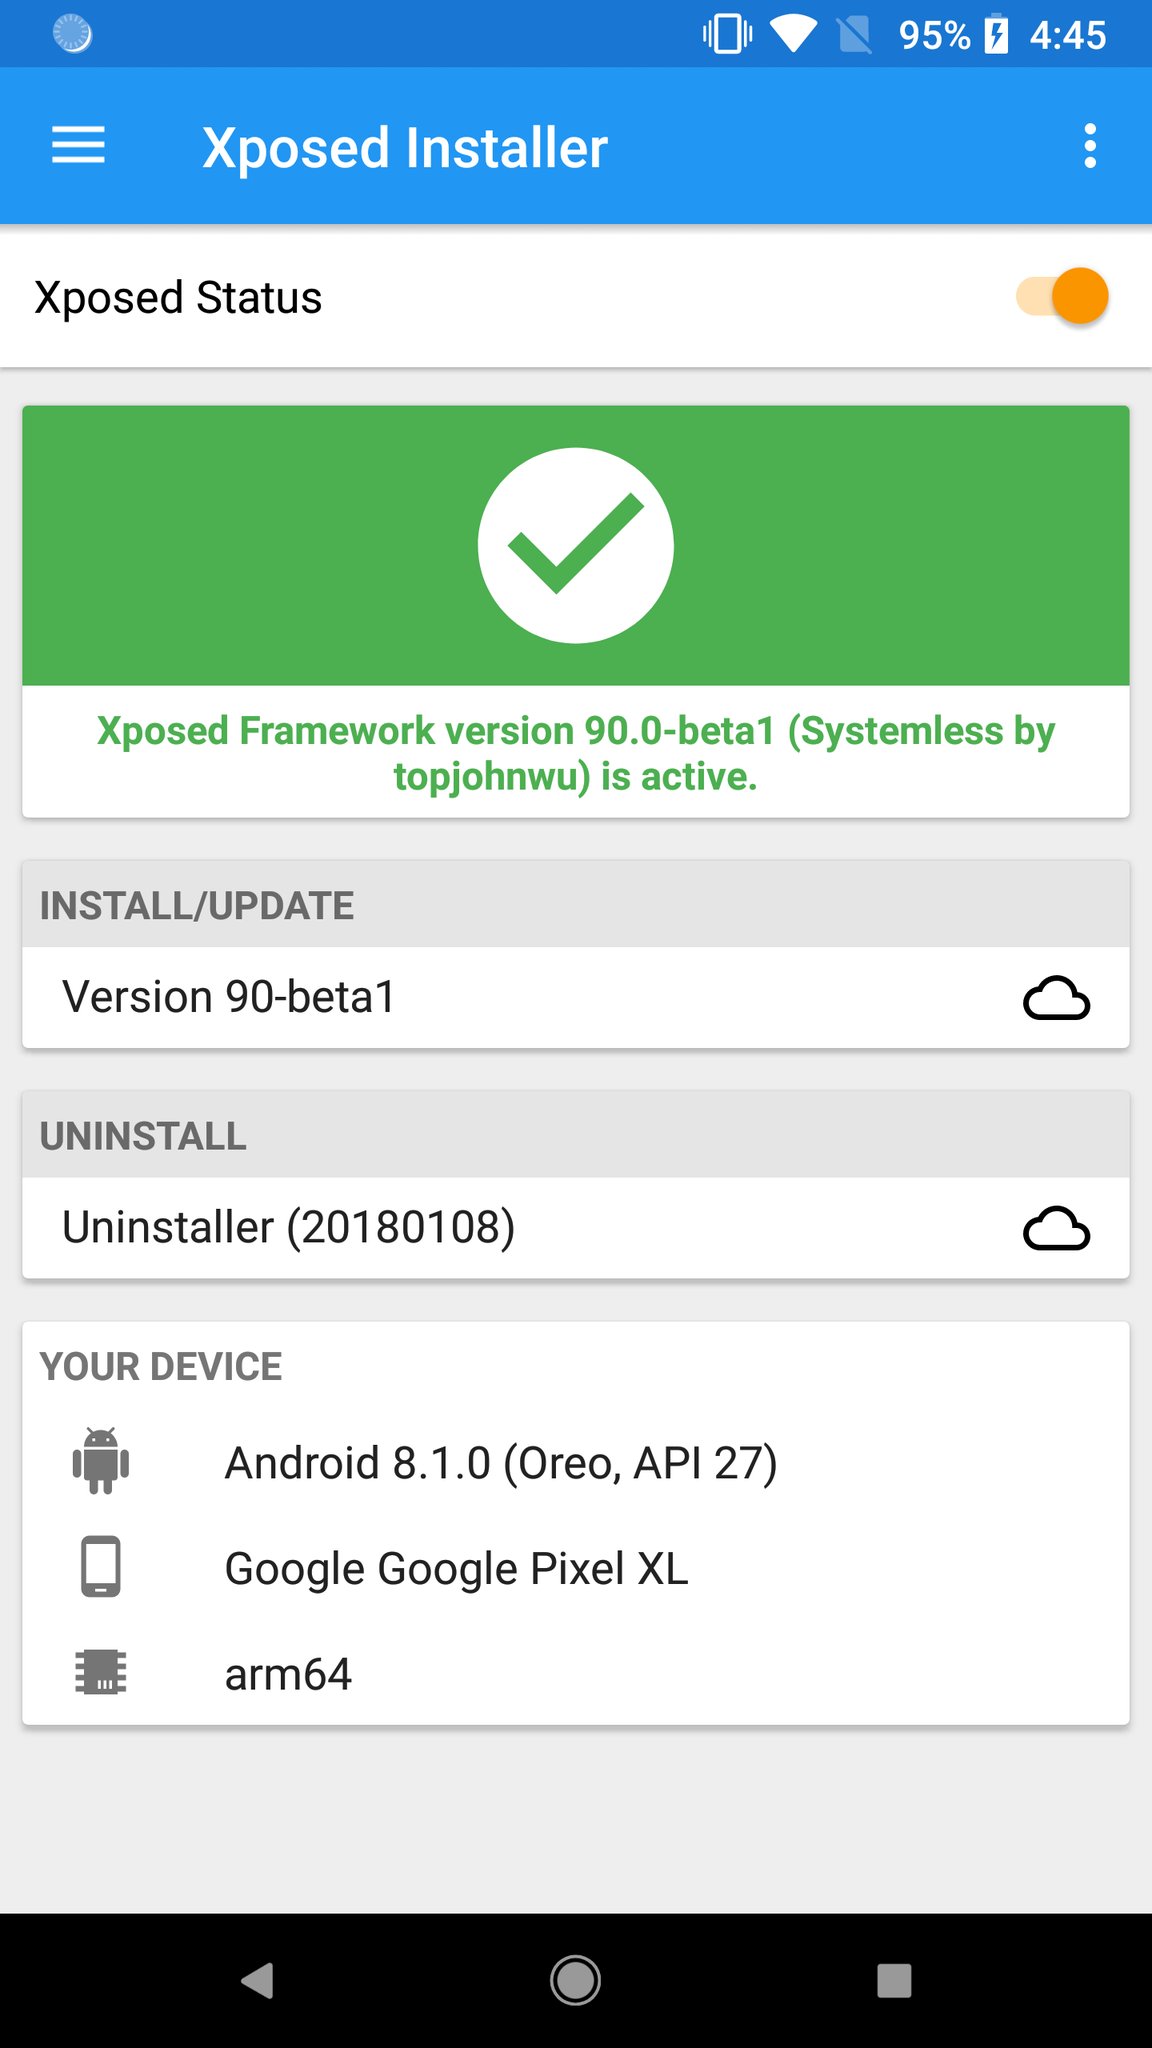
- Now, click on Xposed Installer and make sure to select the Android Oreo versions of Xposed which will be API 26 and API 27 for Android 8.0 Oreo and Android 8.1 Oreo respectively so that it will be compatible with your device running Android Oreo as seen from the screenshot attached below
 Now, make sure to follow all the steps mentioned in the above tutorial properly in order to download and install Systemless Xposed on your device running Android Oreo.
Also, if you face any difficulties in installing either Magisk or Systemless Xposed for Android Oreo on your device then you can comment with any of your queries in the comments section below and we will make sure to solve your queries at the earliest.
source: xda


Join The Discussion: